

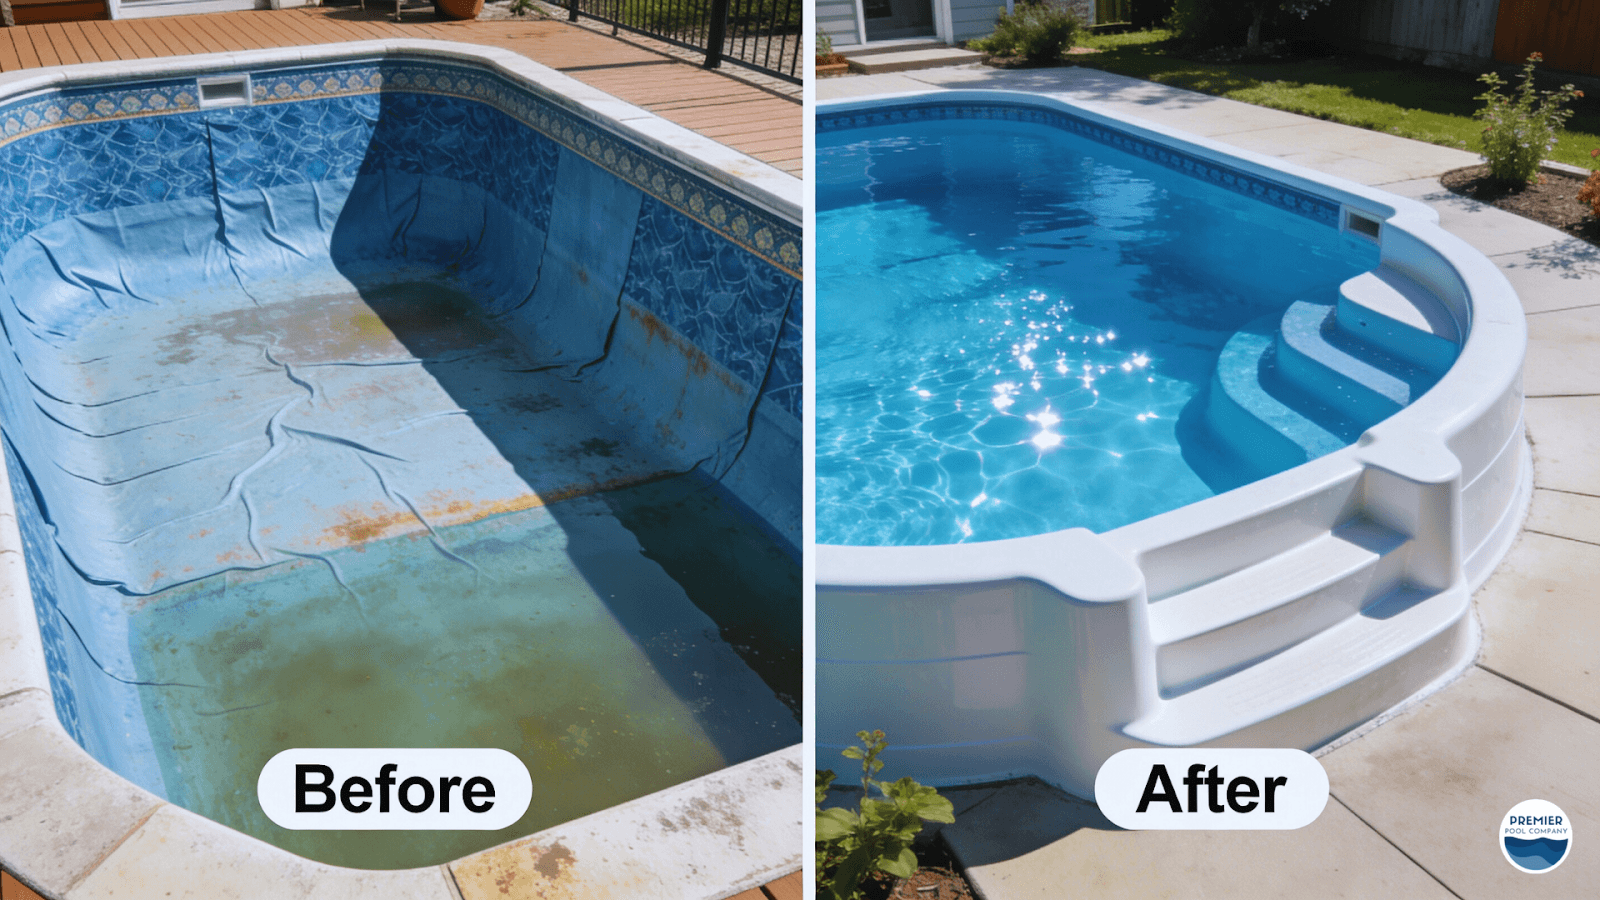
If you're like most pool owners I work with in Central Ohio, you've probably replaced your vinyl liner at least once, maybe twice. Each time costs $4,000-$7,000, and you know another replacement is just 5-7 years away. It's frustrating, expensive, and honestly, there's a better solution.
I'm Aaron Lehner, co-founder of Premier Pool Co., and over the past decade, I've helped hundreds of homeowners make the switch from vinyl liner pools to durable fiberglass installations. What started as a simple pool repair business has evolved into specializing in complete liner-to-fiberglass conversions, and I've learned exactly what works (and what doesn't) through years of hands-on experience.
The transformation process might sound intimidating, but I'm here to walk you through every single step. From the initial assessment to that exciting moment when you take your first swim in your new fiberglass pool, I'll share the insider knowledge I've gained from completing over 200 successful conversions right here in Ohio.
In this comprehensive guide, you'll discover:
• The complete 6-step conversion process we use at Premier Pool Co.
• Realistic timelines and cost breakdowns based on actual projects
• Common challenges you might face (and how to overcome them)
• Technical specifications and material requirements
• Maintenance differences that will save you time and money
• Real answers to the questions every homeowner asks
Whether you're tired of patching tears, sick of dealing with wrinkles, or simply ready for a pool that doesn't require constant babysitting, this guide will give you the confidence to make an informed decision. Let's dive in.
TLDR - Why Convert Your Liner Pool to Fiberglass?
After years of building pools in Central Ohio, I've seen firsthand how transforming a liner pool to fiberglass changes everything for homeowners. Here's what you need to know:
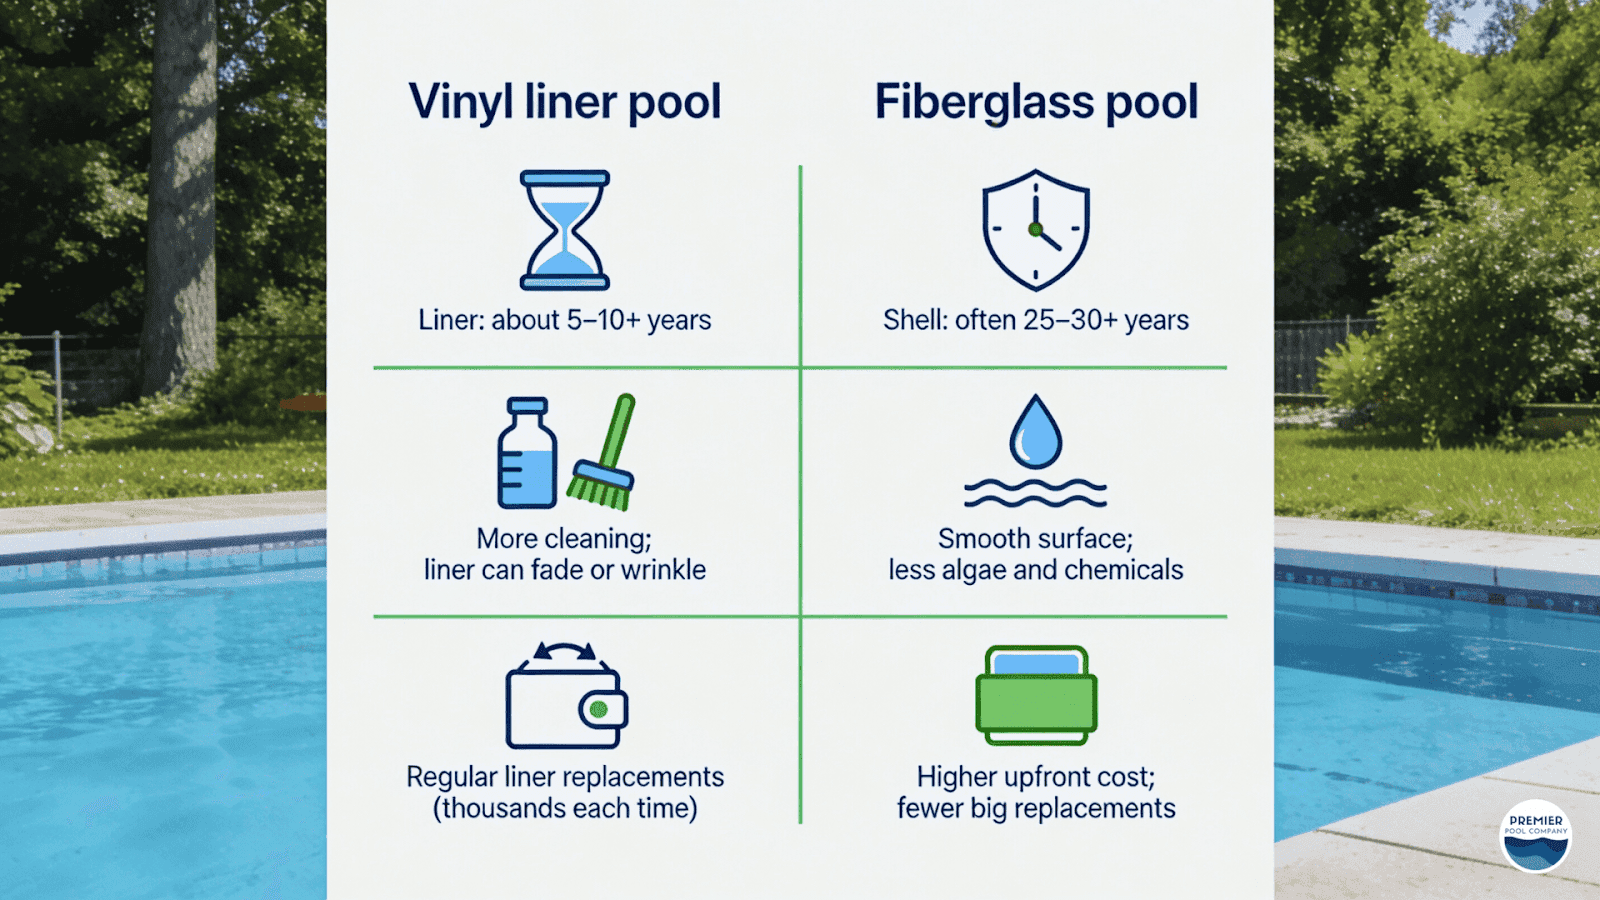
• Fiberglass pools last 25+ years with their non-porous gel coat surface, while vinyl liners need replacement every 5-9 years.
• While daily chemical and cleaning costs are similar ($1,000/year for both), fiberglass pools eliminate the recurring $7,500 liner replacement expense every 7-10 years.
• Installation takes just 3-7 days compared to 4-6 weeks for concrete alternatives.
• The smooth gel coat surface eliminates rough textures that can snag swimsuits or scratch feet.
• Energy savings from superior insulation properties of fiberglass shells.
Final Verdict: If you're tired of replacing vinyl liners every 5-7 years and dealing with constant maintenance, converting to fiberglass is the smart long-term investment at Premier Pool Co.
Understanding the Benefits of Fiberglass Pools
In my years of converting pools across Central Ohio, I've watched homeowners struggle with the same decision you're facing right now. Let me share what I've learned from transforming hundreds of liner pools into durable fiberglass installations.
Why Fiberglass Outperforms Vinyl Liners
Here's the reality I explain to every client:
Durability That Lasts Decades
I've seen vinyl liners fail after just 5-7 years, leaving homeowners with wrinkles, tears, and costly replacements. Fiberglass pools feature a non-porous gel coat surface engineered to last 25+ years. The material resists UV degradation and chemical damage, eliminating the recurring $4,000-$7,000 liner replacement cycle that plagues vinyl pools.
Maintenance Cost Savings
One of the biggest surprises for my clients is the immediate drop in maintenance expenses:
• Chemical usage decreases by 50% due to the non-porous surface preventing algae adhesion.
• Weekly cleaning time drops from 3-4 hours to under 1 hour.
• The smooth gel coat eliminates the need for aggressive brushing that damages vinyl.
Installation Speed Advantage
Concrete pools keep your backyard torn up for 4-6 weeks. Fiberglass pool installations we complete at Premier Pool Co. typically finish in 3-7 days, minimizing disruption to your property and allowing you to enjoy your pool by the following weekend.
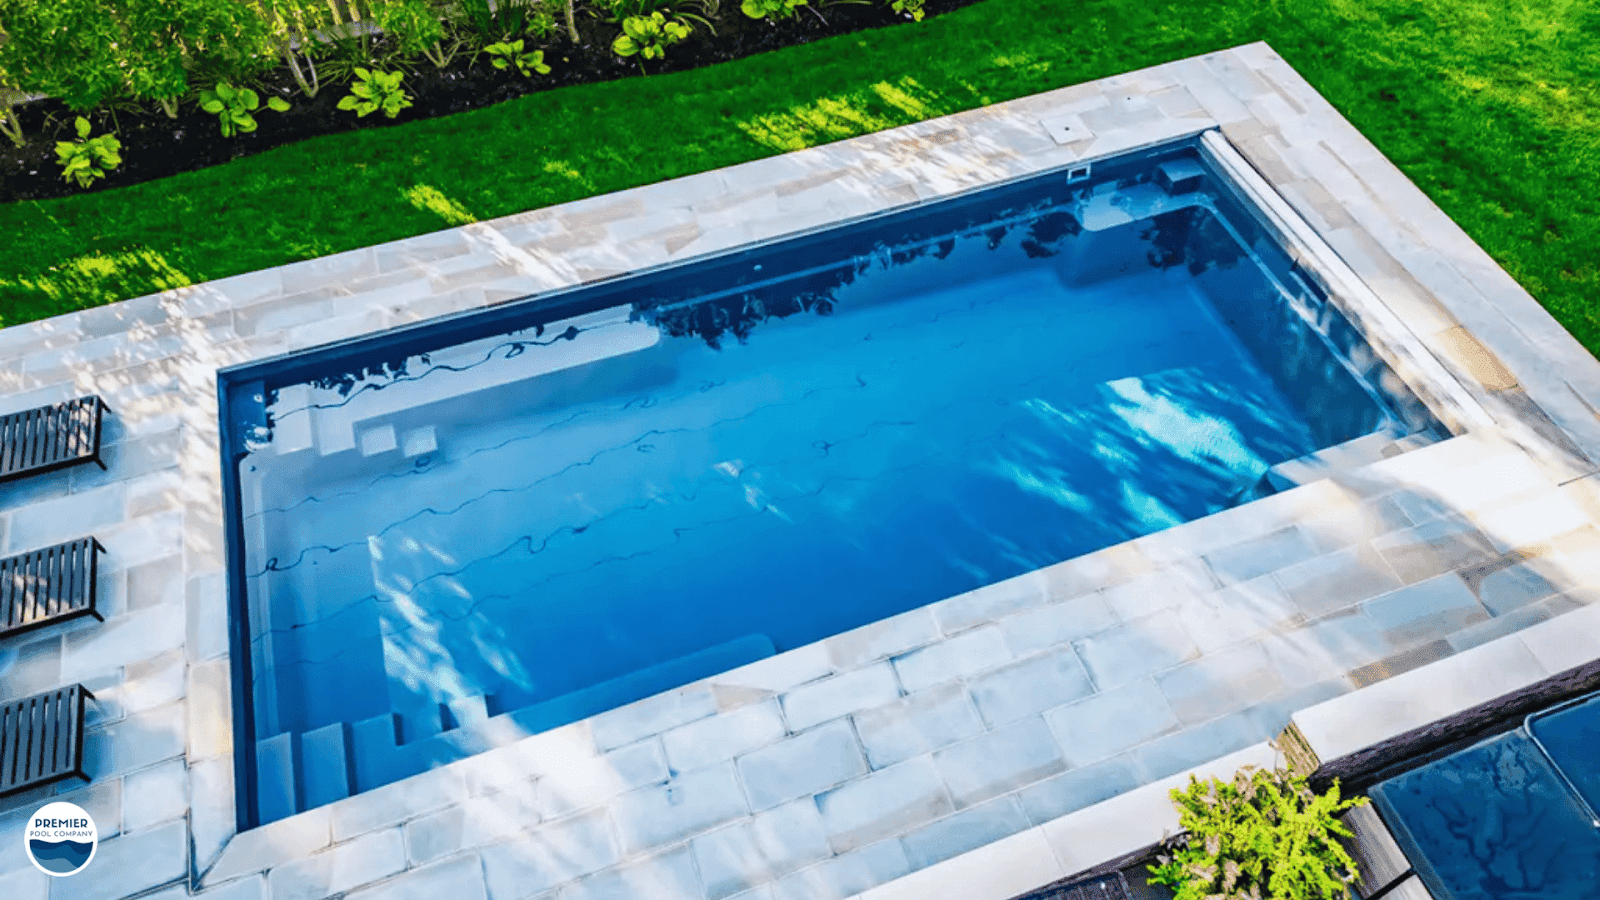
Comfort and Aesthetics
The gel coat surface provides a noticeably smoother feel underfoot. I've had clients tell me it's like comparing walking on silk versus burlap. Plus, modern fiberglass pools come in various colors and finishes from Caribbean blue to graphite gray, that complement any landscape design. For inspiration on choosing the right pool material for Ohio's climate, check out our guide on the best pool materials for Ohio backyards.
Current Liner Pool Condition
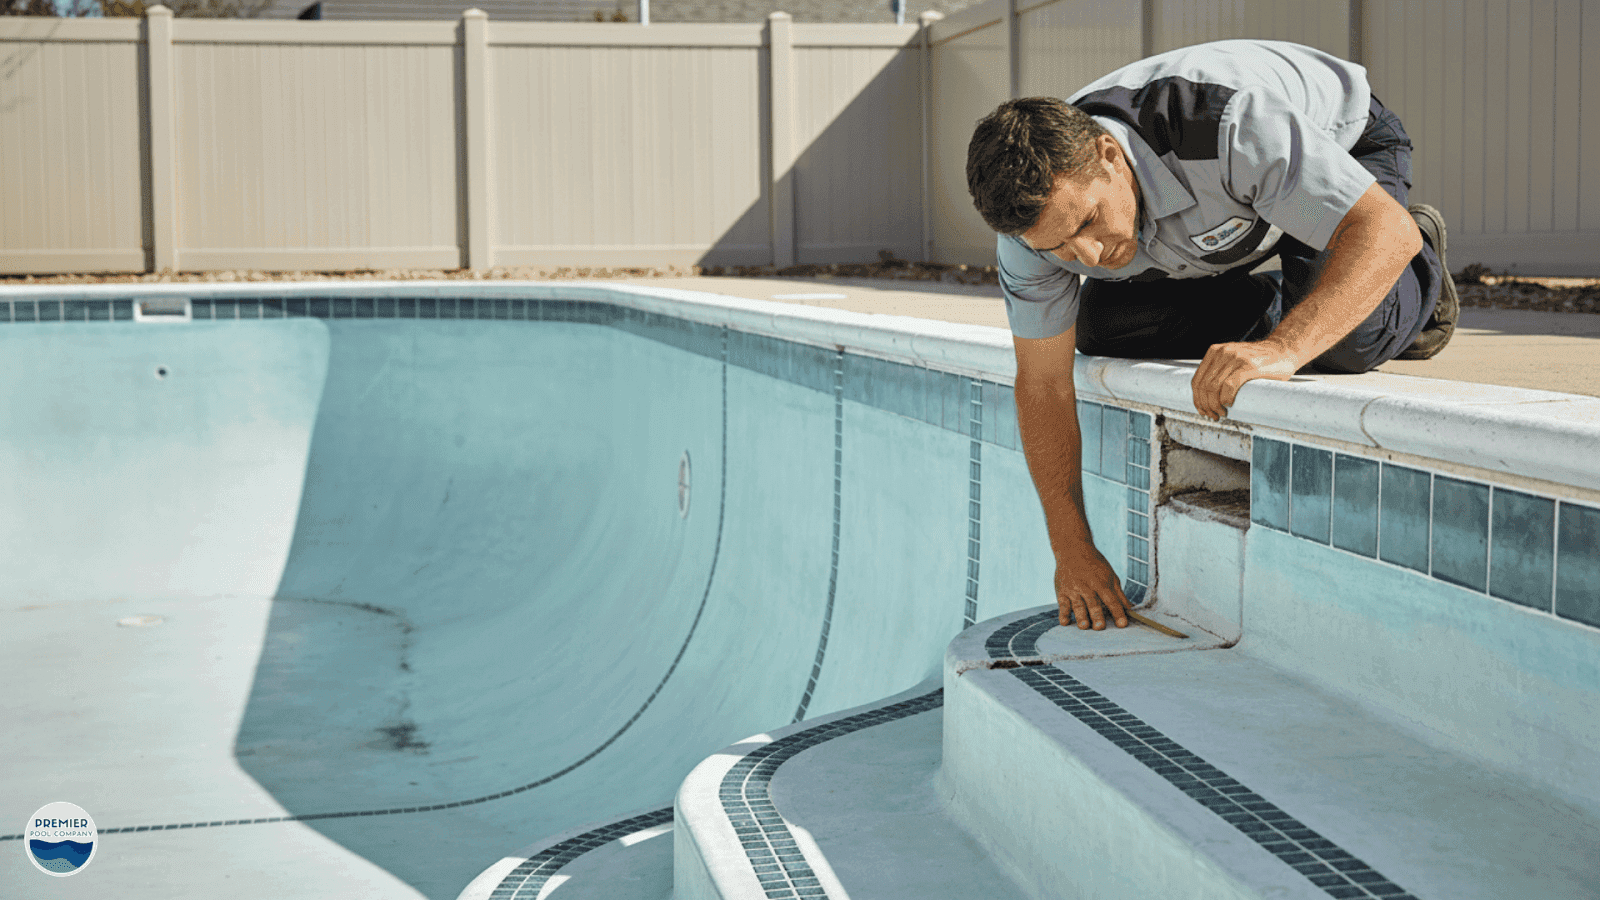
Before diving into the transformation process, it's crucial to thoroughly assess your liner pool. Trust me, I've learned this the hard way, skipping this step on early projects caused headaches later. Here's my systematic approach to pre-conversion inspection:
Critical Inspection Checklist:
Liner Condition Assessment
• Check for tears, punctures, or wrinkles indicating material fatigue.
• Look for fading or discoloration (signs of UV damage and age).
• Inspect bead tracks where the liner attaches to coping.
• Note any areas where liner has pulled away from walls.
Structural Integrity Evaluation
• Examine pool walls for cracks, particularly at corners and steps.
• Check for bulging or bowing walls (indicates soil pressure issues).
• Inspect pool floor for sinking or settlement.
• Assess the condition of coping stones and deck interface.
Mechanical Systems Check
• Test all skimmers and return jets for proper function.
• Inspect plumbing lines for leaks (look for wet spots in the yard).
• Verify pump and filter operation.
• Check electrical connections and bonding wires.
I always document these findings with photos, it helps when discussing the project scope with clients and ensures we don't miss any necessary repairs.
It’s also important to evaluate the condition of the pool's surrounding area. Ensure that the deck, patio, and landscaping are in good shape and won't be negatively impacted by the transformation process. This preliminary assessment will help you determine the extent of repairs needed and allow you to plan accordingly. Addressing these issues early on will ensure a smoother installation process and contribute to the long-term success of your fiberglass pool.
Preparing for the Transformation: Tools and Materials Needed

Having completed hundreds of these conversions, I can tell you that proper preparation makes the difference between a smooth 3-day installation and a week-long nightmare. Here's exactly what you'll need:
Essential Tools Checklist:
• Submersible pump (minimum 1/2 HP for efficient draining).
• Wet/dry vacuum for final water removal.
• Reciprocating saw or angle grinder for liner removal.
• Pry bars and utility knives.
• Power drill with masonry bits.
• Level (6-foot minimum) and measuring tape.
• Wheelbarrow for material transport.
Key Materials Required:
• Hydraulic cement for crack repairs.
• Pool-grade expanding foam (for void filling).
• Filter sand or pea gravel (calculate 1-2 tons for average pool).
• Polymer-modified pool plaster for wall preparation.
• New gaskets and fittings for skimmers/returns.
The fiberglass shell itself will be delivered by crane, I always schedule this for the morning of installation day to avoid weather delays. For more detailed guidance on pool construction stages, see our Step-by-Step Pool Construction Guide.
Step 1: Draining Your Liner Pool
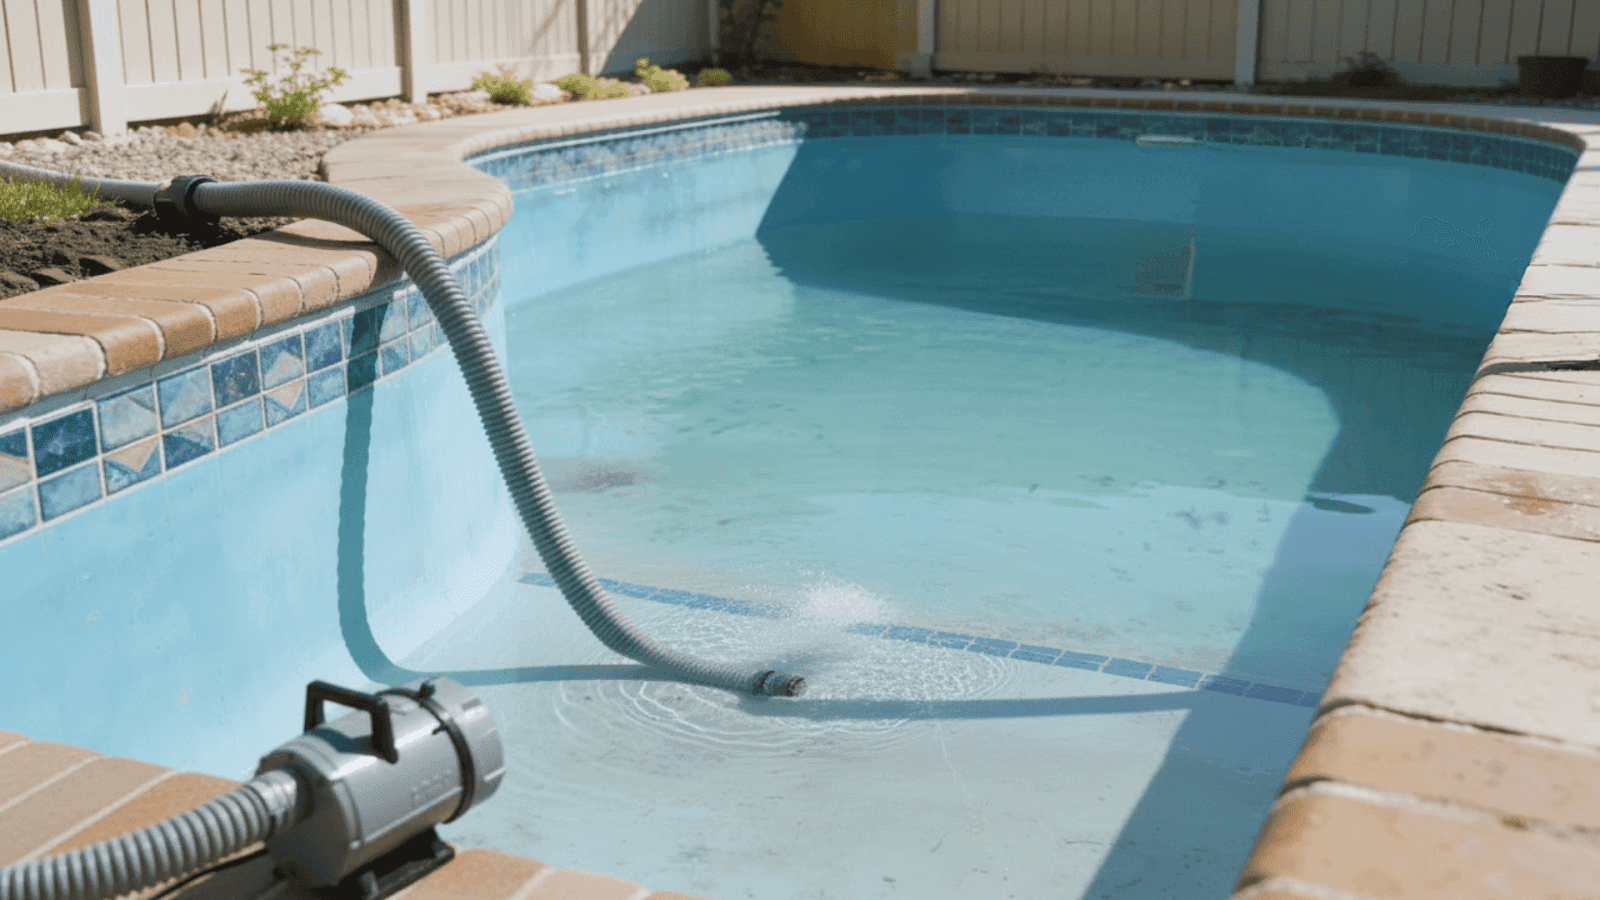
The first critical step is draining your pool completely. I always tell homeowners this takes longer than they expect, plan for 6-8 hours for an average 20,000-gallon pool.
Draining Process:
1. Position your submersible pump at the pool's deepest point.
2. Run discharge hose at least 50 feet from the pool (check local drainage regulations).
3. Monitor water level every 30-60 minutes.
4. As water drops below 12 inches, reposition the pump to capture remaining water.
5. Use wet/dry vacuum for final cleanup of corners and crevices.
Pro tip from experience: Never drain a pool during heavy rain or when groundwater tables are high, hydrostatic pressure can actually pop an empty pool out of the ground. I learned this the hard way on a project in Johnstown back in 2019.
Step 2: Removing the Existing Liner
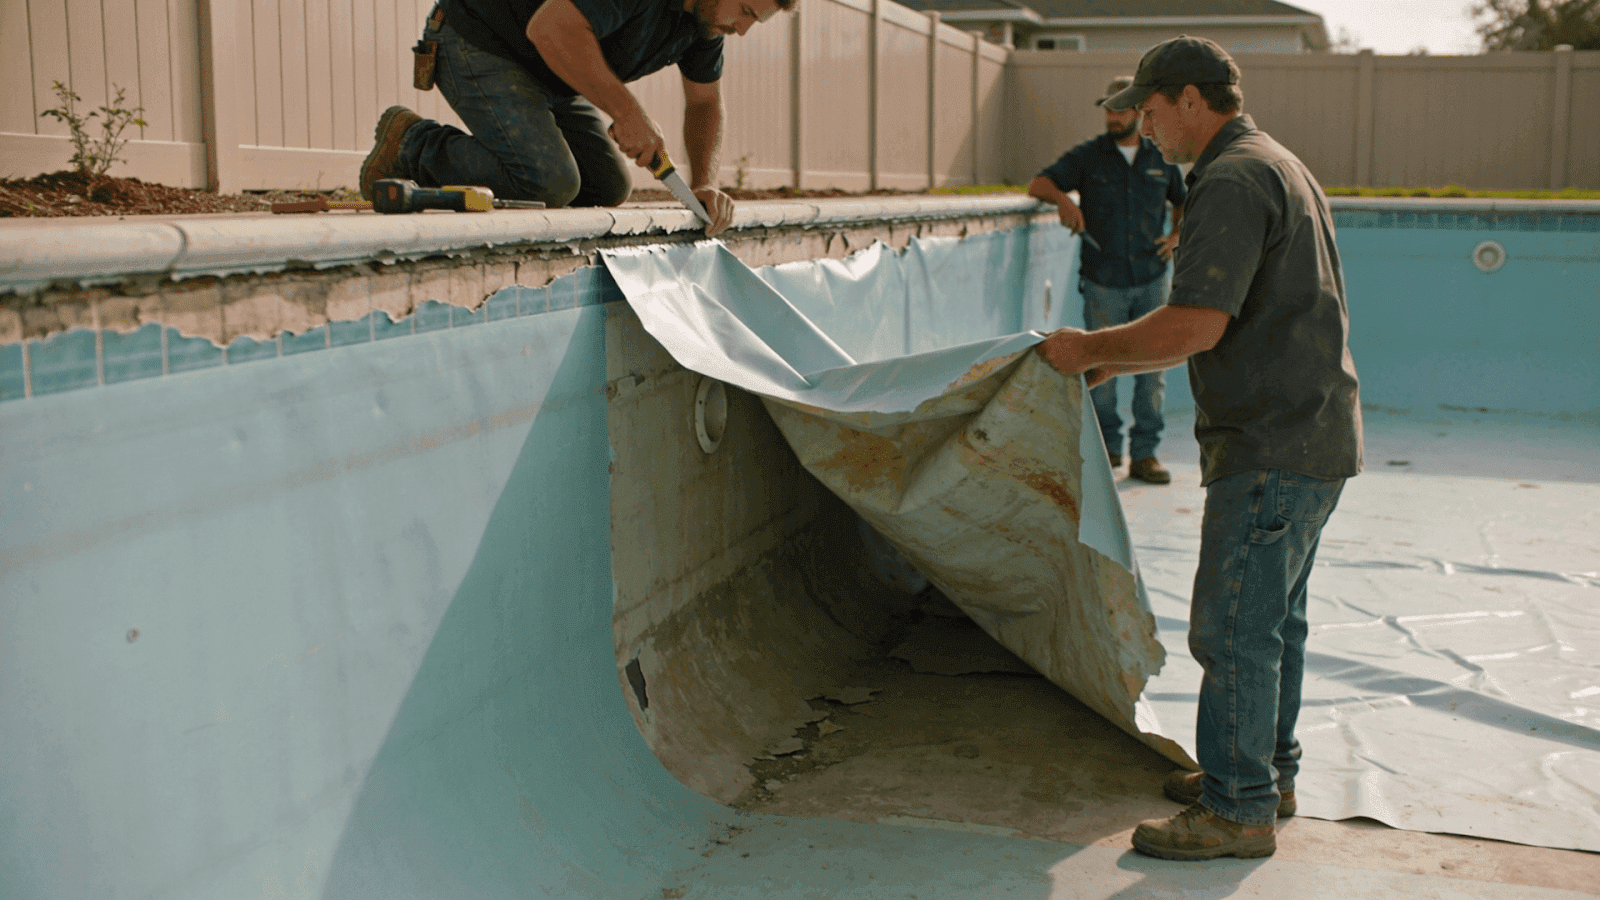
Liner removal is straightforward but tedious. Here's my systematic approach:
1. Remove all liner track caps and coping stones securing the liner.
2. Detach faceplates from skimmers and return fittings.
3. Use a utility knife to cut the liner into 3-foot strips for easier handling.
4. Roll and dispose of liner sections according to local waste regulations.
5. Inspect exposed walls and floor immediately while everything is visible.
Once the liner is out, take this opportunity to photograph everything, wall condition, plumbing connections, structural details. These photos prove invaluable if questions arise during fiberglass installation.
Step 3: Inspecting and Repairing the Pool Structure
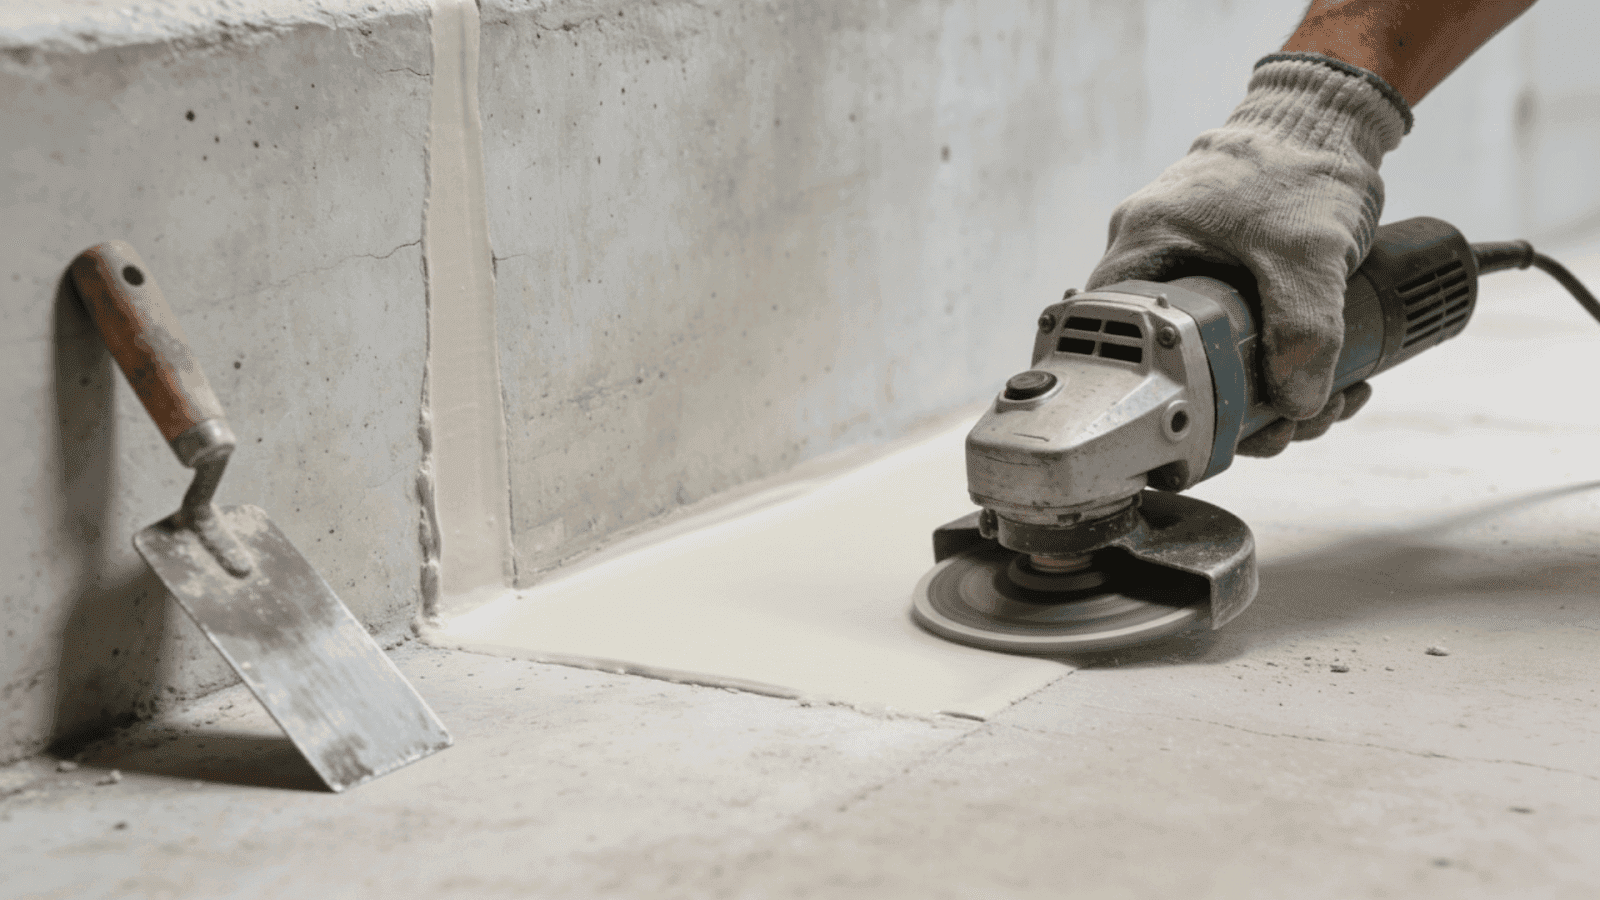
This is where my construction background really comes into play. With the liner removed, you can finally see the true condition of your pool shell:
Critical Inspection Points:
• Hairline cracks (less than 1/8 inch): Fill with hydraulic cement.
• Larger structural cracks: May require epoxy injection or structural reinforcement.
• Hollow-sounding areas when tapped: Indicates delamination requiring foam injection.
• Rust stains around fittings: Replace corroded components before fiberglass installation.
Repair Protocol:
1. Grind out cracks to create a V-shaped groove.
2. Apply hydraulic cement or epoxy as appropriate.
3. Allow 48-72 hours cure time (critical, don't rush this).
4. Smooth repaired areas flush with existing surface.
5. Apply a bonding agent to ensure proper adhesion.
Skipping repairs here will haunt you later; the fiberglass shell will only highlight structural problems, not hide them.
In addition to repairing cracks and holes, check the pool’s framework for any signs of rust or corrosion. If you find any areas of concern, use a grinder or saw to remove the damaged sections and replace them with new materials. Ensure all repairs are completed to a high standard, as the stability of the fiberglass shell depends on a solid and secure foundation. Once all repairs are made, you can move on to the installation of the fiberglass shell.
Step 4: Installing the Fiberglass Shell
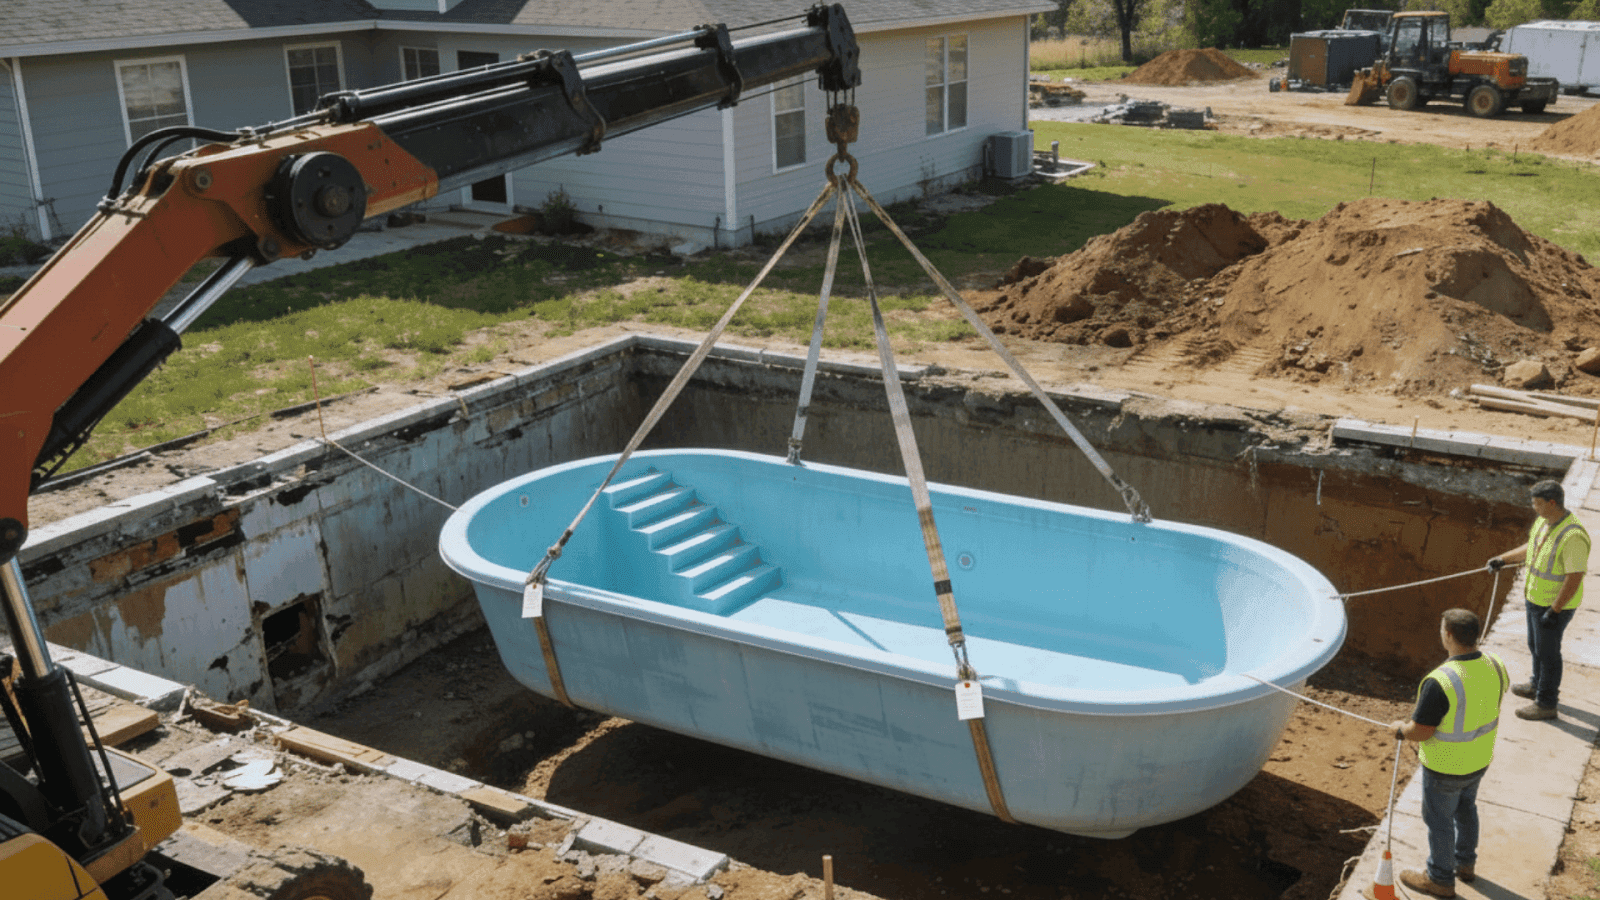
This is the moment of truth, the most exciting and nerve-wracking part of the entire conversion. I always schedule crane delivery for 7 AM to avoid afternoon winds.
Installation Sequence:
1. Clear 20-foot radius around pool for crane operation.
2. Position crane with certified operator (no exceptions on this).
3. Attach lifting straps to designated shell mounting points.
4. Guide shell slowly into excavation with 3-4 crew members.
5. Verify shell seats properly against all pool walls.
6. Check level in all directions before releasing the crane.
Tolerance is critical here, 1/4 inch off-level will cause major water chemistry and circulation issues. I use a 6-foot level and verify at 8-12 points around the shell before securing.
After securing the shell, inspect all seams and joints to ensure they are properly sealed. Apply additional sealant as needed to create a watertight barrier. This step is crucial to prevent leaks and ensure the longevity of your fiberglass pool. Once the shell is securely in place and all seams are sealed, you can move on to the backfilling and leveling process.
Step 5: Backfilling and Leveling the Pool
Backfilling is where many DIYers make costly mistakes. The shell needs uniform support on all sides to prevent flexing or cracking.
Backfill Material Choice:
• Filter sand: My preference for consistent compaction.
• Pea gravel: Better drainage but harder to compact evenly.
• Never use native soil, it settles unevenly.
Proper Backfilling Technique:
1. Fill both sides simultaneously in 12-inch lifts.
2. Add 6 inches of water to the shell as you backfill (equalizes pressure).
3. Tamp each lift thoroughly, no shortcuts.
4. Check shell level after each lift.
5. Continue until backfill reaches 6 inches below coping height.
I use approximately 8-10 tons of material for an average 16x32-foot pool. Budget $400-600 for quality backfill materials.
Step 6: Final Touches and Filling the Pool
The finishing touches transform your pool from a construction site to a backyard showpiece:
Final Installation Steps:
• Install cantilever coping or bullnose edge stones.
• Apply polyurethane sealant at all coping joints.
• Connect and test all plumbing lines.
• Verify electrical bonding meets code.
• Install new gaskets on all fittings.
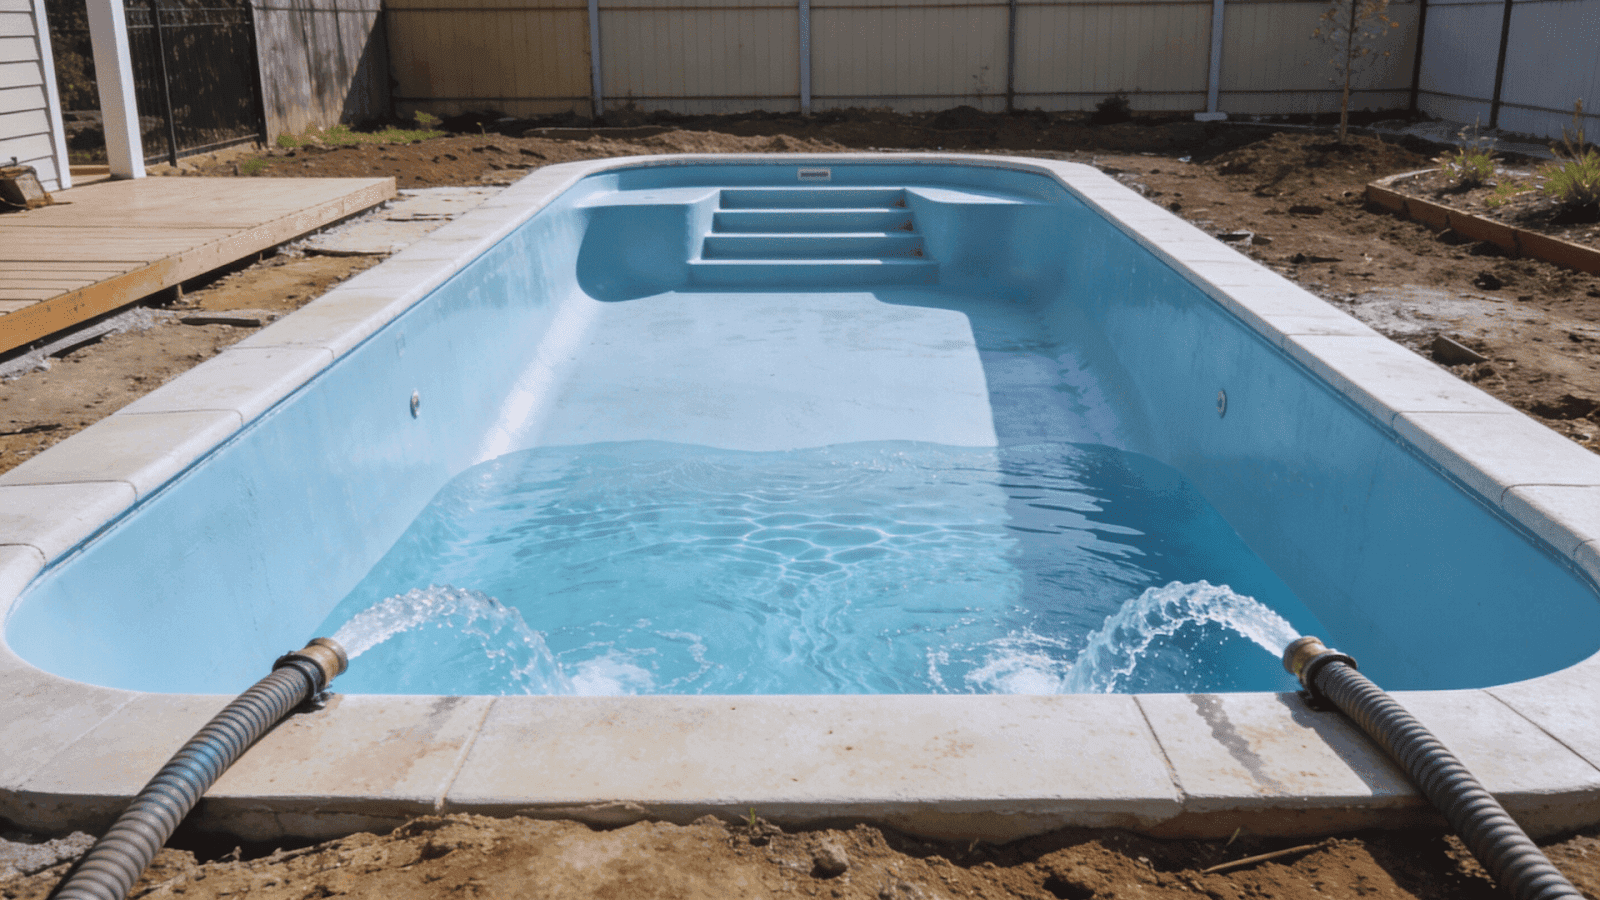
Filling Protocol:
1. Begin filling at the lowest point.
2. Monitor fill rate (I recommend 24-48 hours for gradual temperature equalization).
3. Check for leaks at every fitting as water rises.
4. Stop at proper operating level (halfway up skimmer opening).
5. Start a circulation system and check for leaks under pressure.
6. Balance water chemistry before the first swim.
Initial chemical treatment is critical, follow the specific recommendations for gel coat pools, which differ from vinyl. For detailed maintenance guidance, check our fiberglass pool pros and cons.
Maintenance Tips for Your New Fiberglass Pool
One of the best parts of my job is telling clients how much easier their life will be with fiberglass. Here's what I tell every new fiberglass pool owner:
Essential Weekly Maintenance (10-15 minutes):
• Test and balance pH (7.2-7.6) and chlorine (1-3 ppm).
• Skim surface debris.
• Empty skimmer baskets.
• Check water level and add if needed.
Monthly Tasks:
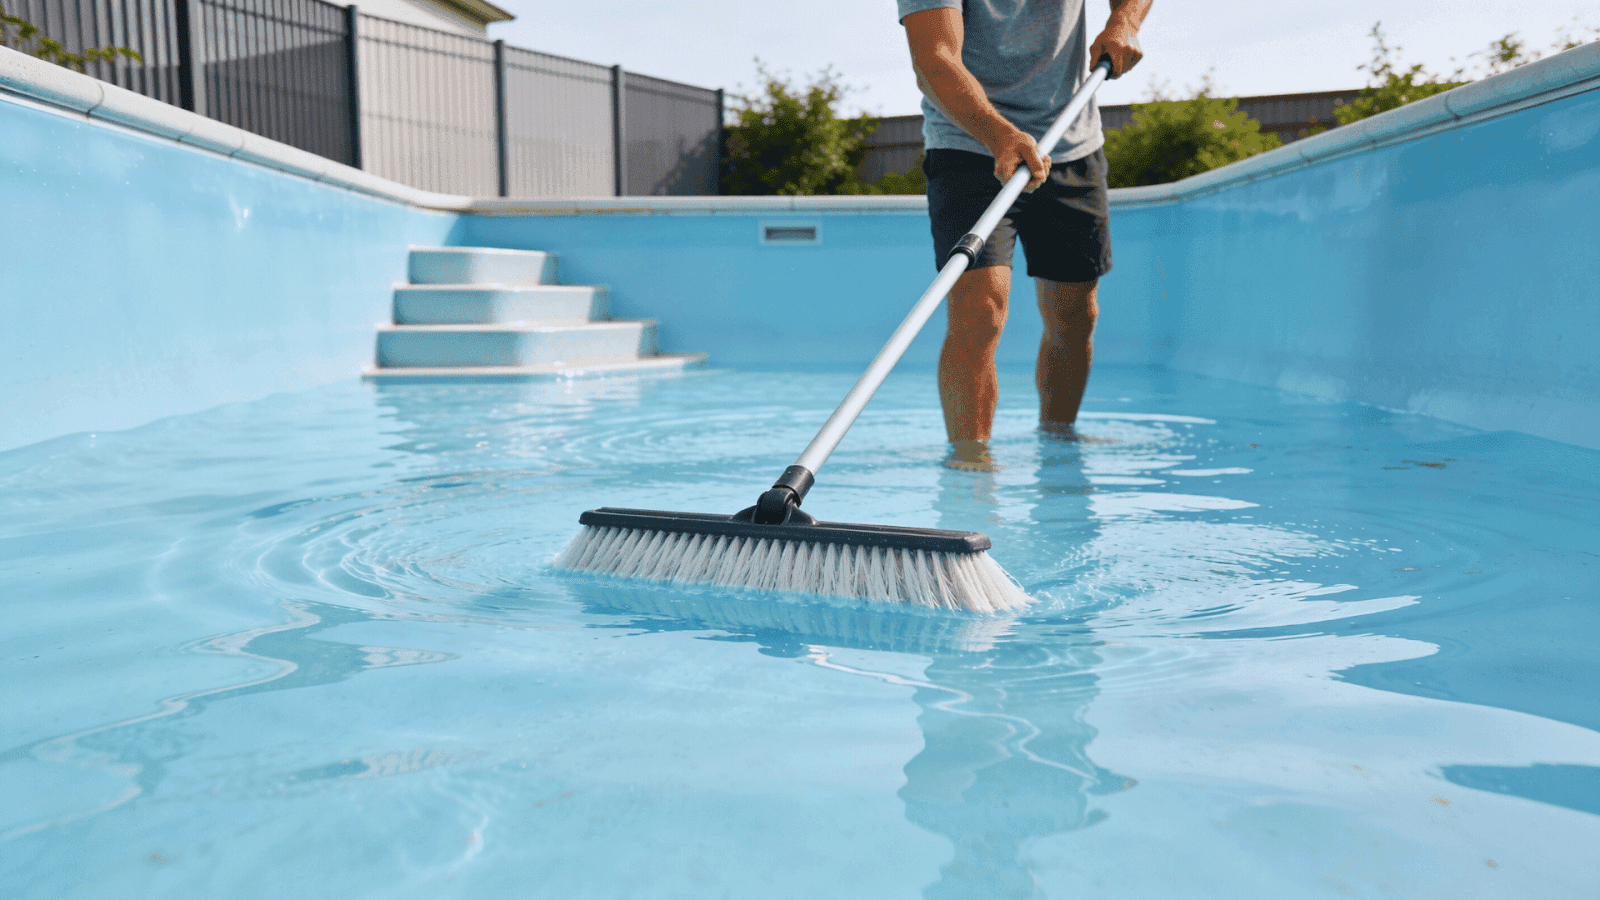
• Brush walls gently (use only soft nylon brushes, never wire).
• Vacuum pool floor.
• Test alkalinity (80-120 ppm) and calcium hardness (200-400 ppm).
• Clean filter cartridge or backwash sand filter.
Annual Maintenance:
• Professional gel coat inspection.
• Re-seal coping joints if needed.
• Check sacrificial anode if installed.
The smooth gel coat surface genuinely makes cleaning easier, I've had clients tell me it cuts their maintenance time in half compared to their old vinyl pool. For comprehensive seasonal care tips, explore our pool liner care guide.
Final Thoughts

After building pools for over a decade, I can confidently say that converting from vinyl liner to fiberglass is one of the best decisions you can make for your backyard. The initial investment pays for itself within 5-7 years through eliminated liner replacement costs and reduced maintenance expenses.
I've walked hundreds of Ohio homeowners through this exact process, and the feedback is consistently positive. The most common thing I hear? "I wish I'd done this years ago."
Here's what you can expect working with us:
• Free on-site assessment and honest recommendations.
• Transparent pricing with no hidden surprises.
• Professional installation by our experienced crew.
• 3-7 day completion timeline for most projects.
• Post-installation support and maintenance guidance.
Transforming your pool doesn't have to be overwhelming. Harold and I built Premier Pool Co. on the principle of making complex projects manageable through clear communication and expert craftsmanship.
Ready to Transform Your Pool?
If you're tired of dealing with vinyl liner headaches and ready to upgrade to a low-maintenance fiberglass pool, I'd love to discuss your project. We'll assess your current pool, provide an accurate quote, and create a timeline that works for your schedule.
Contact Premier Pool Co. today.
Frequently Asked Questions (FAQs)
Q1. How long does it take to convert a liner pool to fiberglass?
A: From start to finish, most conversions take 3-7 days. Day one involves draining and liner removal, days 2-3 cover structural repairs and preparation, day 4 is the fiberglass shell installation (the exciting part!), and days 5-7 include backfilling, finishing touches, and filling. Weather and the extent of structural repairs can affect this timeline, but I always provide a realistic schedule during our initial assessment.
Q2. What does a liner-to-fiberglass pool conversion cost?
A: Conversion costs typically range from $25,000-$45,000 for an average 16x32-foot pool, depending on your pool's current condition, required structural repairs, and chosen finishes. This might seem significant, but remember, you're eliminating recurring liner replacement costs ($4,000-$7,000 every 5-7 years). Most homeowners see ROI within 5-7 years. I always provide detailed, transparent quotes after assessing your specific pool.
Q3. Can any vinyl liner pool be converted to fiberglass?
A: Most liner pools are excellent candidates for conversion, but I won't sugarcoat it, some require more preparation than others. Pools with severe structural damage, significant settling, or non-standard shapes may need additional repairs or custom shell fabrication. During our free assessment, I'll honestly evaluate your pool's condition and discuss any challenges upfront. I've successfully converted pools that other contractors said were impossible, but I'll never promise something I can't deliver.
Q4. Will my pool equipment work with the new fiberglass shell?
A: In most cases, yes! Your existing pump, filter, heater, and plumbing can usually be adapted to work with the fiberglass shell. We'll replace gaskets, fittings, and any corroded components during installation. However, if your equipment is over 10 years old, I often recommend upgrading to more energy-efficient models, it's the perfect opportunity since we're already working on the plumbing connections. I'll assess your equipment during the initial consultation and provide recommendations.
Q5. How do I maintain a fiberglass pool compared to my vinyl liner pool?
A: This is where fiberglass really shines, maintenance is significantly easier. The gel coat surface prevents algae from embedding like it does in vinyl, so you'll use 50% less chlorine. Weekly maintenance takes just 10-15 minutes: test and balance water chemistry, skim debris, and empty skimmer baskets. Monthly tasks include gentle brushing (soft nylon brush only) and vacuuming. No more worrying about puncturing the liner or dealing with wrinkles. I provide all new fiberglass pool owners with a detailed maintenance guide, and we're always available to answer questions.
More Blogs

Aaron Lehner
Should You Add A Swimming Pool Tanning Ledge To Your Pool Design? Here’s My Take On This.
Thinking about adding a swimming pool tanning ledge to your backyard? Discover the costs, pros, cons, and design tips for a perfect pool tanning ledge.

Aaron Lehner
How Long Do Fiberglass Pools Last (Based on Ohio Climate)
Wondering how long do fiberglass pools last? Discover fiberglass pool lifespan, life expectancy, and maintenance tips for Ohio homeowners, up to 50+ years.

Aaron Lehner
Winterizing A Pool - How To Prepare For Ohio Winters
Learn how to winterize your pool for Ohio's brutal freeze-thaw cycles. Step-by-step guide to protect plumbing, balance chemistry, and avoid $5,000 mistakes.