

In this comprehensive guide, you'll discover the essential pool liner maintenance tips to extend your liner's lifespan, prevent costly repairs, and keep your swimming pool in pristine condition. Learn from proven strategies that work for vinyl, fiberglass, and tile liners.
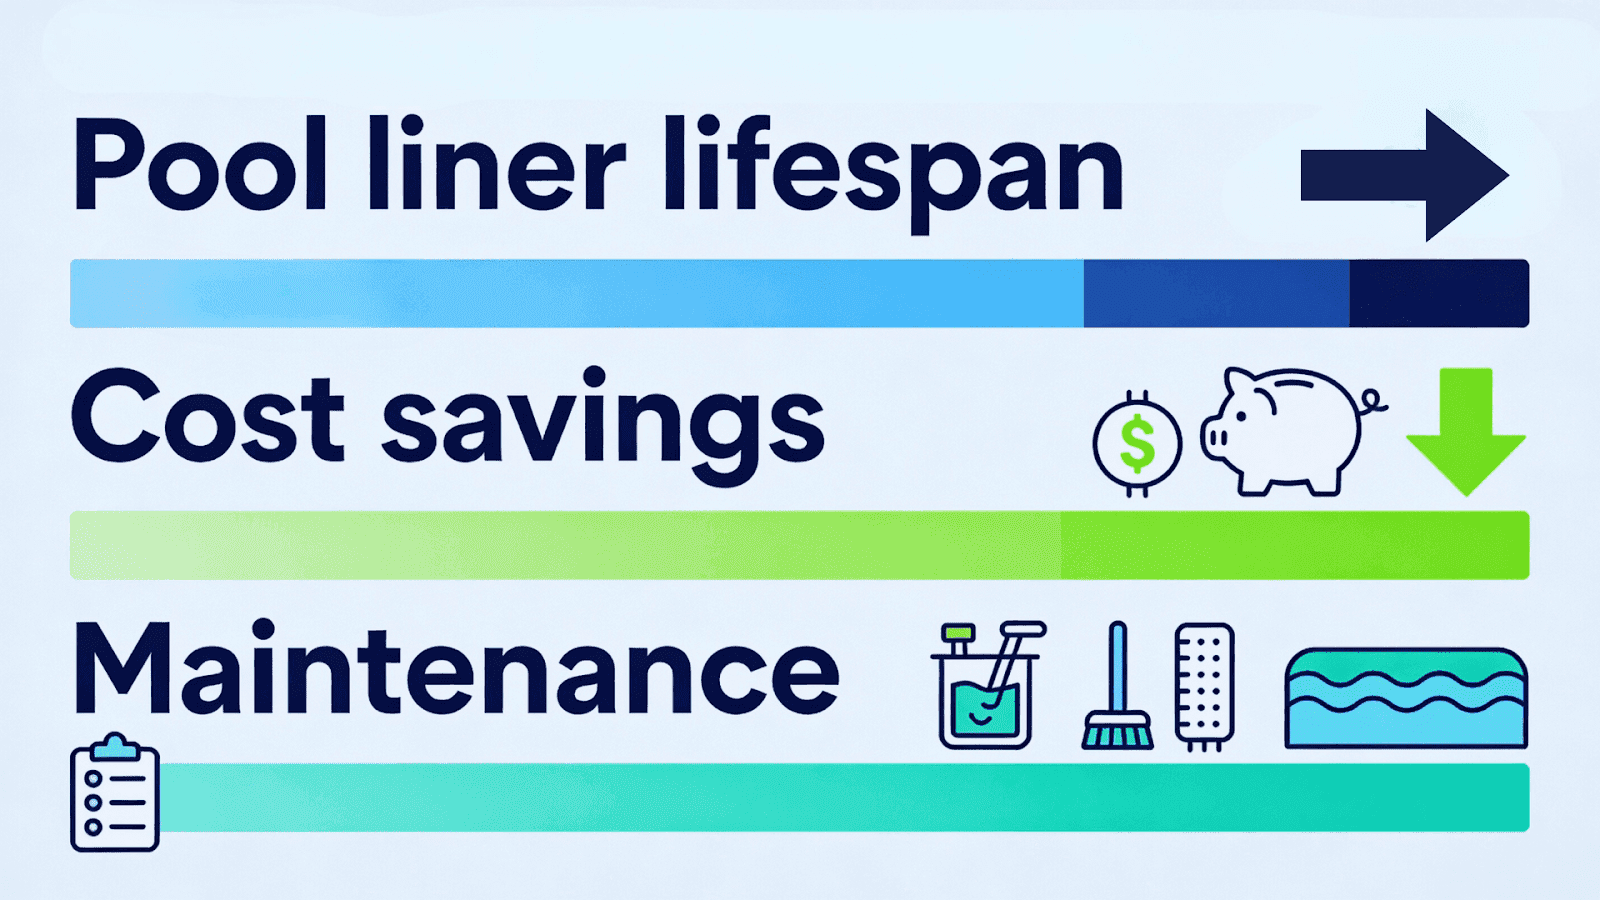
I've been in the pool maintenance business for over 15 years, and if there's one thing I've learned from servicing thousands of pools, it's this: a properly maintained pool liner can last 12-15 years, while a neglected one might need replacement in just 5-7 years. That's a difference of thousands of dollars.
At Premier Pool, we've seen every pool liner issue imaginable, from premature fading caused by improper chemical balance to catastrophic tears that could have been prevented with simple monthly inspections. According to the Association of Pool & Spa Professionals, pool liner replacement costs average $4,000-$7,000, yet most of these expenses are completely avoidable.
You're here because you want to protect your investment and keep your pool looking pristine, right? I'm going to share the exact maintenance strategies we use at Premier Pool that have helped our clients extend their liner lifespan by an average of 40%. These aren't theoretical tips, they're battle-tested methods from years of hands-on experience.
Here's what makes this guide different: I won't just tell you what to do; I'll explain why it matters and show you how to avoid the costly mistakes I see pool owners make every single day. Let's dive in.
TLDR : Pool Liner Maintenance Essentials
1. Pool liner lifespan: Properly maintained liners last 12-15 years vs. 5-7 years when neglected
2. Cost savings: Avoid $4,000-$7,000 replacement costs through preventive maintenance
3. Three main liner types: Vinyl (affordable, customizable), Fiberglass (durable, low-maintenance), Tile (premium, long-lasting)
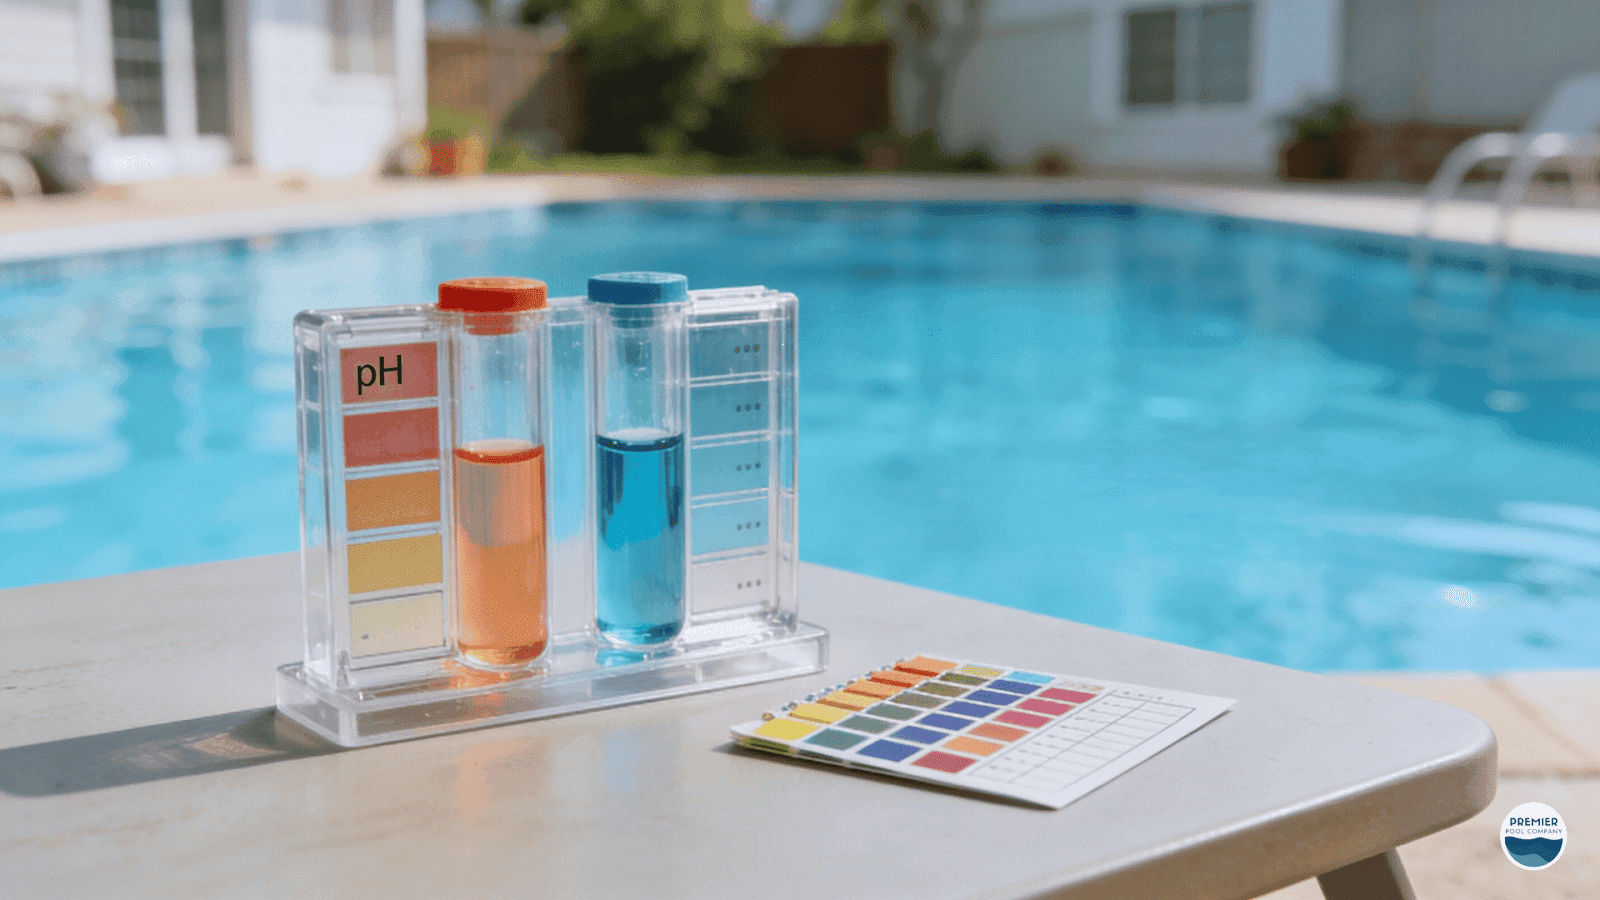
4. Critical maintenance factors: Water chemistry balance (pH 7.2-7.8), regular inspections, proper cleaning techniques
5. According to APSP data, 67% of premature liner failures are due to improper chemical balance
6. Essential tools needed: Soft-bristle brush, pH test kit, non-abrasive cleaner, pool cover
7. Inspection schedule: Weekly for chemical balance, monthly for physical damage, seasonal for winterization
8. Common issues to watch: Wrinkles, fading, tears, algae growth, staining
9. DIY repairs work for small tears (<2 inches); professional help needed for extensive damage
10. Premier Pool recommendation: Invest in preventive maintenance to extend liner life by 40%
Understanding Pool Liners: Types and Materials
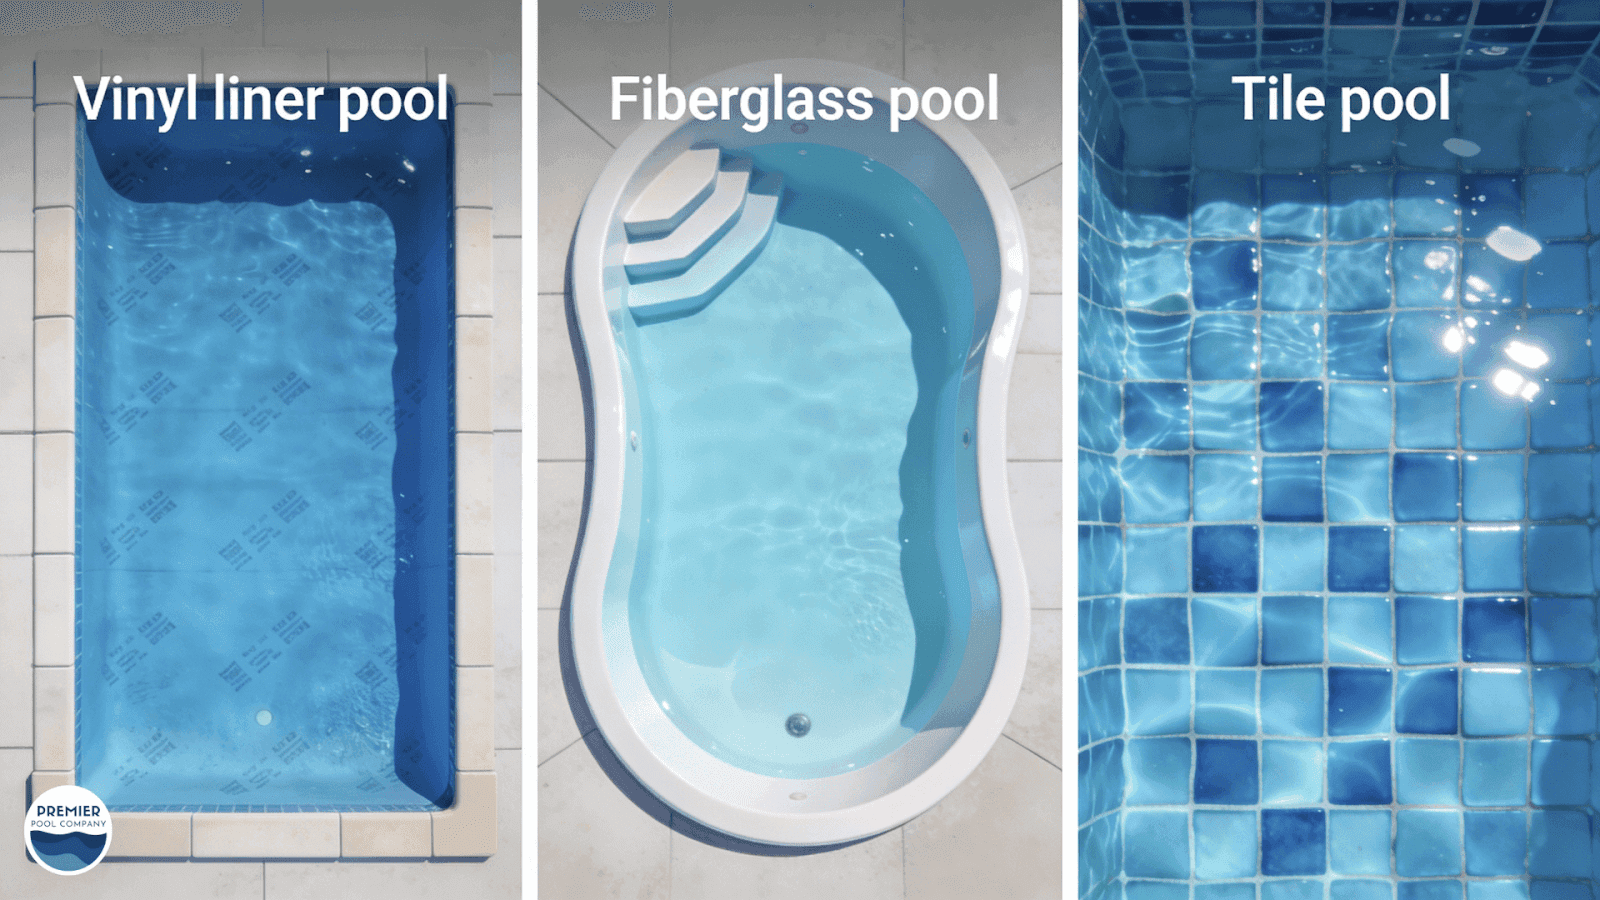
Pool liners protect the pool structure, ensure it's watertight, and prevent surface damage. Available in various types and materials, each offers unique advantages suited to different pool needs.
Vinyl liners are popular for residential pools due to their affordability and versatility, available in various colors and patterns. However, they require regular maintenance to prevent damage from UV exposure and chemicals. Fiberglass liners offer durability and low maintenance, with a smooth surface resistant to algae growth, though they cost more initially. Tile liners provide an elegant, sophisticated look and exceptional durability but require professional installation and regular cleaning to prevent algae buildup.
Importance of Regular Pool Liner Maintenance
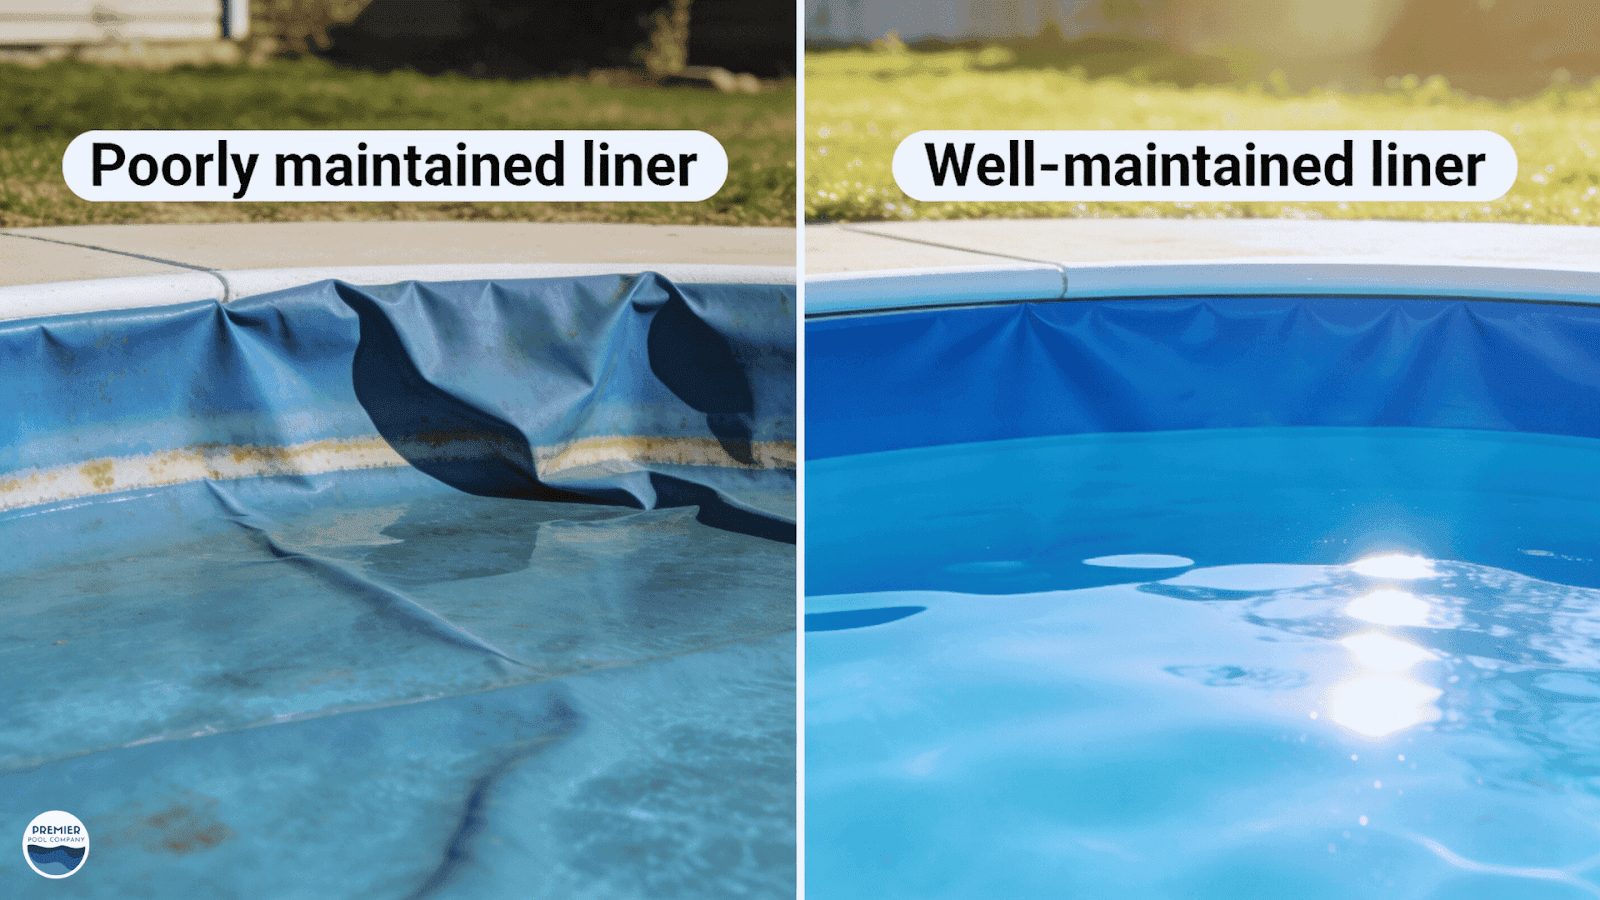
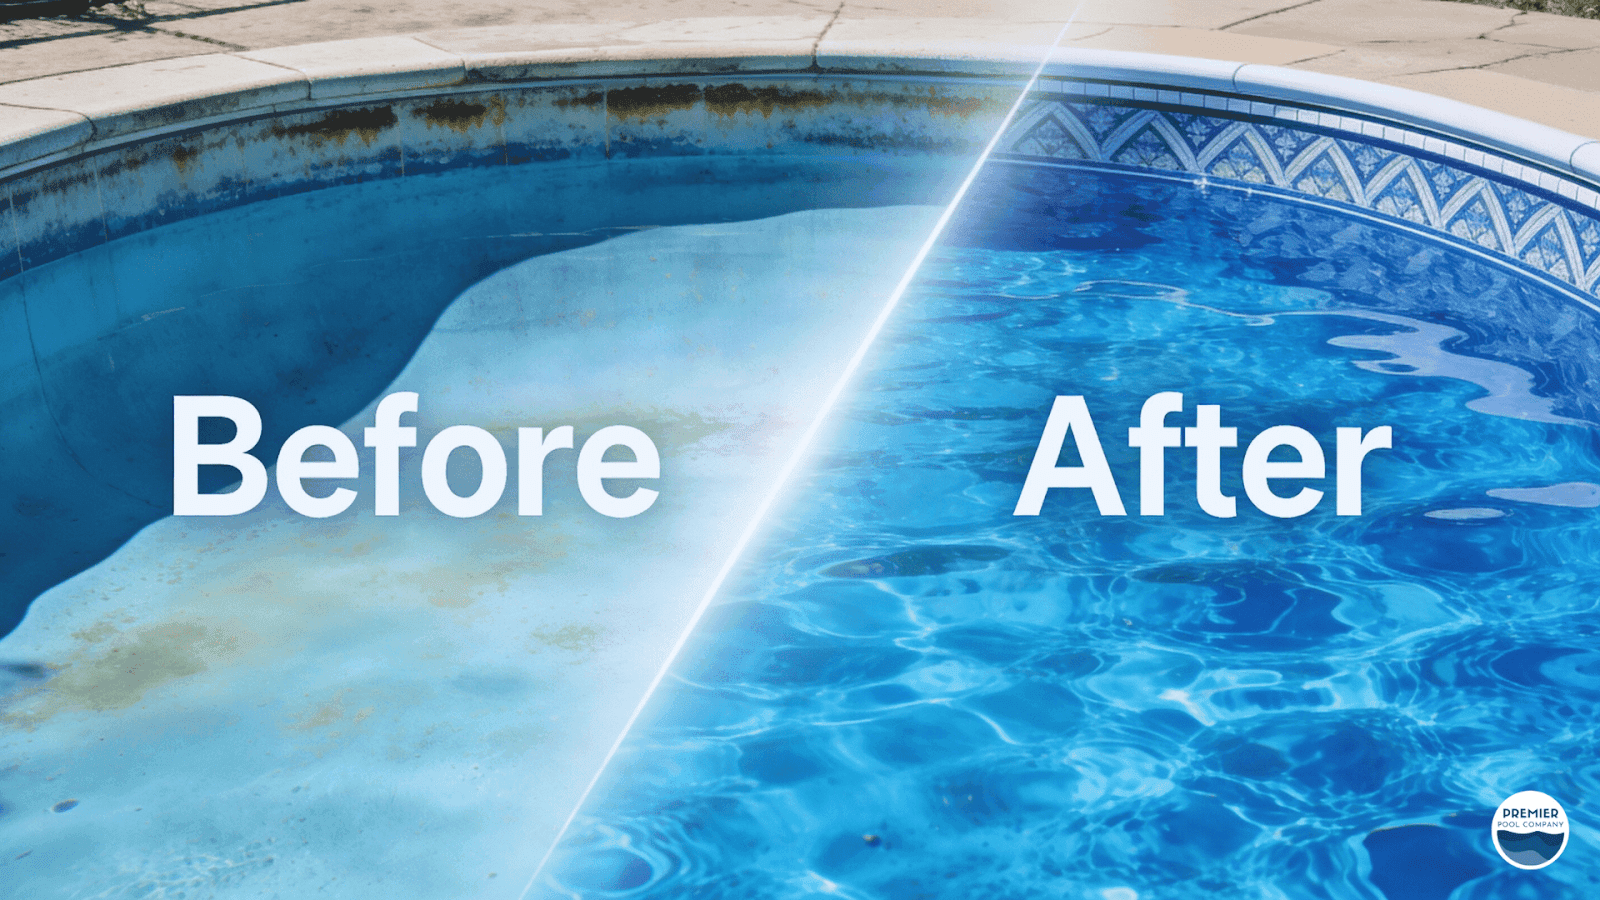
Regular maintenance extends your pool liner's life significantly, saving you replacement costs. It helps identify minor issues before they become major problems, preventing costly repairs.
Proper maintenance prevents leaks that increase water bills and damage pool structure. Regular inspections catch tears, punctures, or weak spots early, allowing prompt repairs and avoiding extensive damage.
Common Pool Liner Issues and How to Identify Them
Even with regular maintenance, pool liners can develop issues over time. After 15 years of servicing pools, I've seen how early identification can save thousands in repair costs. Here are the most common pool liner problems I encounter and how you can spot them before they become serious:
Key Issues to Watch For:
• Wrinkling or Shifting
- Caused by: Improper installation, ground movement, or water level changes
- Warning signs: Visible folds or bunching in the liner material
- Action needed: Smooth out immediately to prevent permanent creasing and tears
- Prevention tip: Maintain consistent water levels throughout the season
• Fading and Discoloration
- Caused by: UV exposure, chemical imbalance, or organic debris accumulation
- Warning signs: Loss of vibrant color, pale or bleached areas, yellowing
- Impact: Weakens liner material by up to 30%, making it susceptible to tears
- Solution: Regular cleaning, proper chemical balance (pH 7.2-7.8), and UV-protective pool cover
• Tears and Punctures
- Common in: Vinyl liners especially
- Caused by: Sharp objects, rough play, pets, or tree branches
- Size matters: Tears under 2 inches = DIY repair with patch kit; larger tears = professional assessment
- Cost impact: Small tear repairs cost $50-$150 vs. $4,000+ for full liner replacement
- At Premier Pool , we recommend monthly visual inspections
• Algae and Mold Growth
- Common in: Warm, humid climates with poor circulation
- Warning signs: Green/black spots, slippery surfaces, musty odor
- Health risk: Can cause skin irritation and respiratory issues
- Prevention protocol: Weekly brushing, maintain chlorine at 1-3 ppm, shock treatment monthly
- Structural damage: If left unchecked for 3+ months, can permanently stain and weaken liner
Identifying and addressing these issues promptly is essential for maintaining a clean, safe pool. I always tell my clients at Premier Pool: "An ounce of prevention is worth a pound of cure." Regular weekly inspections take just 10 minutes but can extend your liner's life by years.
Essential Maintenance Tips for Longevity
After maintaining thousands of pools over the years, I've identified the key practices that separate liners lasting 5 years from those lasting 15+ years. These aren't complicated procedures, they're simple habits that, when done consistently, dramatically extend your pool liner's life. Let me walk you through the essential maintenance routine I recommend to every Premier Pool client:
Core Maintenance Practices:
• Maintain Proper Water Chemistry
- Test weekly: pH (7.2-7.8), alkalinity (80-120 ppm), chlorine (1-3 ppm)
- Why it matters: 67% of premature liner failures stem from chemical imbalance
- pH too high (>7.8): Causes scaling, reduces chlorine effectiveness
- pH too low (<7.2): Acidic water corrodes liner, causes wrinkles
- Investment: Quality test kit ($25-$50) vs. liner replacement ($4,000+)
- Premier Pool tip: Test after heavy rain or pool parties, these disrupt chemistry
• Use High-Quality Pool Covers
- Blocks 60% of UV damage (primary cause of fading)
- Reduces debris accumulation by 90%
- Maintains consistent water temperature
- Cost: $100-$400 for quality cover
- ROI: Extends liner life by 3-5 years
• Conduct Regular Inspections
- Weekly: Visual check for tears, discoloration, wrinkles
- Monthly: Physical inspection—run hands along liner surface
- Quarterly: Check seams and stress points
- What to look for: Tears, punctures, weak spots, shifting, wrinkles
- Early detection: Small tear repair costs $50-$150 vs. $4,000+ replacement
- At Premier Pool, we offer free inspection services
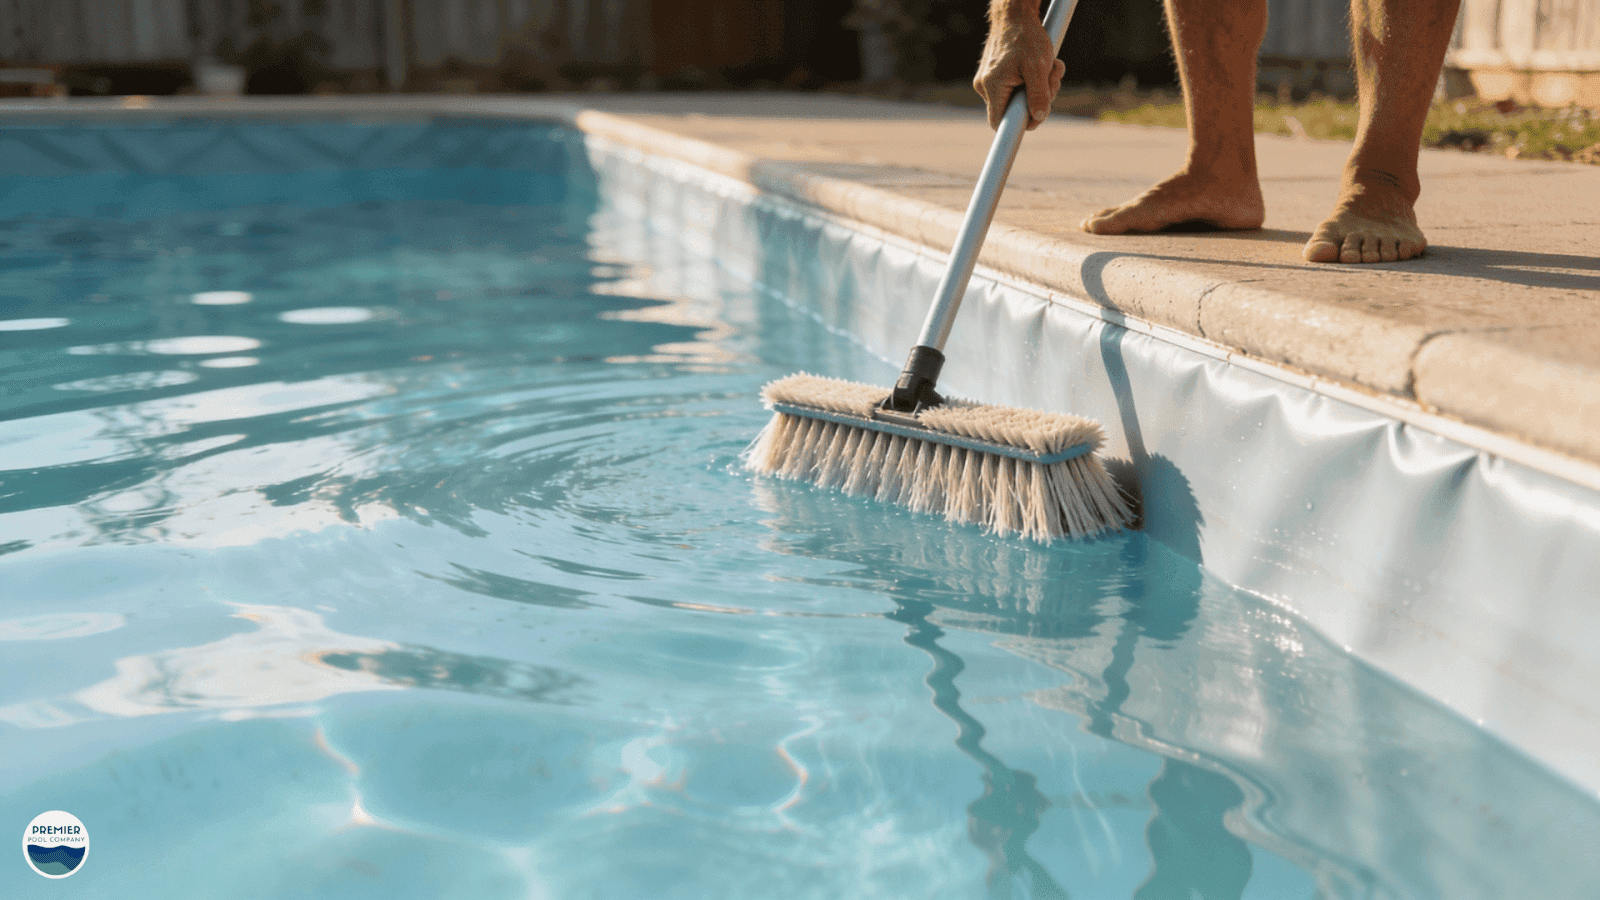
• Use Proper Cleaning Techniques
- Tools: Soft-bristle brush only (never wire or stiff brushes)
- Cleaners: pH-neutral, non-abrasive products designed for vinyl
- Frequency: Brush walls/floor weekly to prevent algae buildup
- Vacuum: Weekly to remove settled debris
- Avoid: Harsh chemicals, abrasive pads, pressure washers
- Damage from improper cleaning: Scratches weaken liner by 40%
• Maintain Consistent Water Levels
- Ideal level: Halfway up skimmer opening
- Too low: Causes liner shrinkage and brittleness (permanent damage)
- Too high: Creates wrinkles and shifting
- Check weekly and adjust as needed
- Seasonal adjustment: Lower 4-6 inches for winterization only
These five practices form the foundation of liner longevity. I've seen clients who follow this routine get 12-15 years from vinyl liners that typically last 8-10 years. The time investment is minimal, about 30 minutes per week, but the cost savings are massive. Think of it as a $4,000 investment earning you 15 minutes of work per week. That's the best ROI you'll find in pool maintenance.
Chemical Balance: Keeping Your Pool Liner Safe
If there's one thing I've learned from dealing with premature liner failures, it's this: 67% of them are caused by improper chemical balance. At Premier Pool, we see this pattern constantly, pool owners who think they're maintaining their water correctly, but small chemical imbalances slowly destroy their liners. Let me show you exactly how to maintain the chemical balance that protects your investment:
The Three Pillars of Chemical Balance:
• pH Levels (7.2-7.8)
- What it measures: Acidity vs. alkalinity of water
- Ideal range: 7.2-7.8 (7.4-7.6 is optimal)
- Test frequency: 2-3 times per week minimum
- Too high (>7.8 = alkaline water):
• Causes scaling on liner surface
• Reduces chlorine effectiveness by 50%
• Creates cloudy water
• Increases risk of calcium buildup
- Too low (<7.2 = acidic water):
• Corrodes vinyl liner material
• Causes wrinkles and brittleness
• Eye and skin irritation for swimmers
• Accelerates equipment damage
- How to adjust: pH increaser (soda ash) or pH decreaser (sodium bisulfate)
- Cost of imbalance: Liner lifespan reduced by 3-5 years
• Chlorine Levels (1-3 ppm)
- Purpose: Disinfects water, kills bacteria/algae
- Ideal range: 1-3 ppm (parts per million)
- Test frequency: Every other day during swimming season
- Too high (>3 ppm):
• Causes liner fading and discoloration
• Bleaches printed patterns on vinyl
• Creates strong chemical smell
• Deteriorates liner material by 30-40% faster
- Too low (<1 ppm):
• Algae growth within 48-72 hours
• Poor water quality and cloudiness
• Bacterial contamination risk
- Application methods: Chlorine tablets, liquid chlorine, or salt system
- Premier Pool tip: Use stabilized chlorine to prevent UV degradation
• Alkalinity (80-120 ppm)
- Function: Acts as pH buffer, prevents rapid pH swings
- Ideal range: 80-120 ppm (100 ppm is optimal)
- Test frequency: Weekly
- Why it matters: Stabilizes pH levels, prevents fluctuation damage
- Too low (<80 ppm):
• pH levels fluctuate wildly ("pH bounce")
• Causes liner corrosion and staining
• Difficult to maintain stable chemistry
- Too high (>120 ppm):
• pH becomes difficult to adjust
• Cloudy water and scaling
• Increased chemical costs
- How to adjust: Alkalinity increaser (sodium bicarbonate) or muriatic acid
Maintaining perfect chemical balance isn't optional, it's essential. I recommend investing in a quality digital test kit ($50-$100) rather than test strips, which can be 20-30% inaccurate. At Premier Pool , we offer water testing services if you want professional verification. A few minutes of weekly testing can save you thousands in liner replacement costs.
Cleaning Techniques for Different Liner Materials
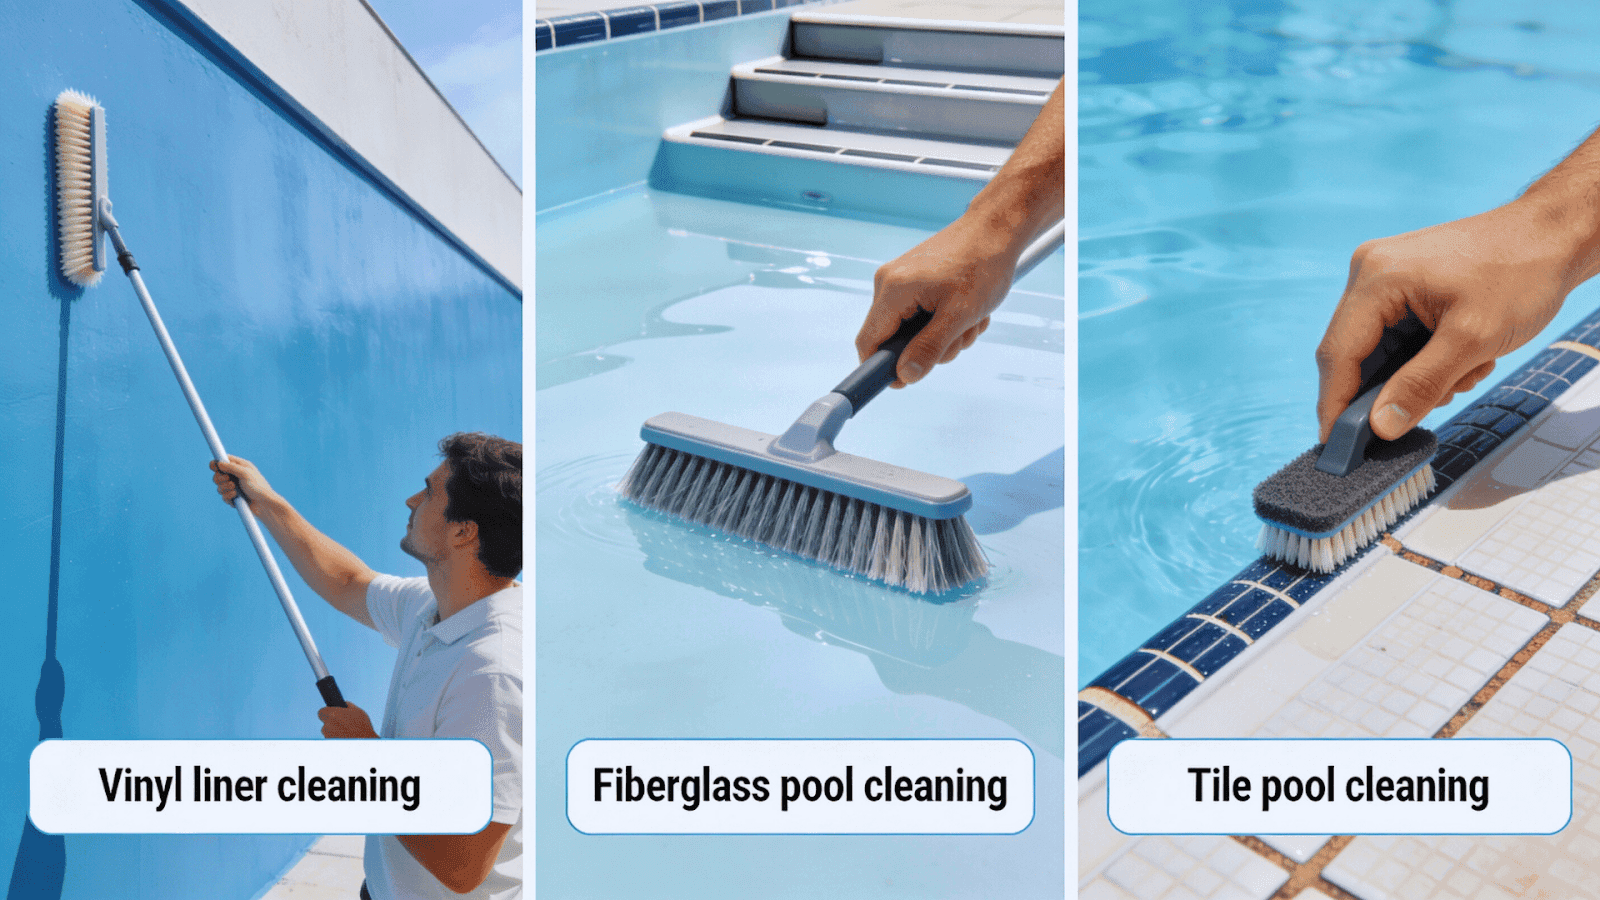
One of the biggest mistakes I see pool owners make is using the same cleaning approach for all liner types. Each material has unique vulnerabilities, and using the wrong cleaning method can void warranties and cause thousands in damage. Here's my material-specific cleaning guide developed from 15 years of field experience:
Cleaning Protocols by Liner Type:
• Vinyl Liners (Most Common - 70% of Residential Pools)
- Primary concern: Susceptible to scratches, fading, and chemical damage
- Recommended tools:
• Soft-bristle nylon brush (never wire or stainless steel)
• Microfiber cleaning pads
• Pool vacuum with vinyl-safe attachments
- Cleaning products:
• pH-neutral cleaners (pH 7.0-7.6)
• Non-abrasive vinyl-specific detergents
• Avoid: Chlorine-based cleaners, abrasive powders, acidic solutions
- Cleaning frequency:
• Brush walls/floor: Weekly minimum
• Vacuum: Twice weekly during swimming season
• Deep clean: Monthly
- Stain removal: Use specialized vinyl stain remover, never bleach
- Cost of wrong cleaner: Fading occurs within 2-3 applications, liner replacement needed
- Premier Pool recommendation: Magic eraser for light surface stains (test small area first)
• Fiberglass Liners (15% of Pools - Premium Option)
- Primary advantage: Naturally resistant to algae growth, smooth non-porous surface
- Recommended tools:
• Soft brush or sponge
• Non-abrasive cleaning pads
• Automatic pool cleaner safe for fiberglass
- Cleaning products:
• Mild detergent (dish soap works)
• Fiberglass-specific cleaners for tough stains
• Avoid: Abrasive materials, harsh chemicals, steel wool
- Cleaning frequency:
• Light cleaning: Weekly
• Full cleaning: Every 2 weeks (less than vinyl due to algae resistance)
- Special considerations:
• Watch for gelcoat scratches - can expose underlying layers
• Remove debris promptly to prevent staining
• Annual gelcoat inspection recommended
- Maintenance advantage: 40% less cleaning time than vinyl
• Tile Liners (10% of Pools - Luxury/Commercial)
- Primary challenge: Grout lines trap algae, mineral deposits, and debris
- Recommended tools:
• Soft brush for tile surface
• Grout brush for seams
• Tile-specific pool cleaner
- Cleaning products:
• Tile and grout cleaner
• Calcium remover for hard water buildup
• Mild detergent for routine cleaning
• Professional-grade tile cleaners for deep cleaning
- Cleaning frequency:
• Grout line brushing: Weekly (critical to prevent algae)
• Tile surface: Weekly
• Professional re-grouting: Every 3-5 years
- Special maintenance:
• Inspect grout quarterly for cracks/gaps
• Seal grout annually to prevent water infiltration
• Professional acid wash every 2-3 years for calcium deposits
- Cost consideration: Maintenance 2-3x more expensive than vinyl
- At Premier Pool , we offer specialized tile cleaning services.
Regardless of liner type, consistency is key. I recommend establishing a weekly cleaning routine: skim debris daily, vacuum twice weekly, brush walls weekly, and test water chemistry 2-3 times per week. This 30-minute weekly investment prevents 90% of the major liner issues I encounter. If you're unsure about the right products for your specific liner, bring a water sample to Premier Pool, we'll test it free and recommend the exact products you need.
Seasonal Maintenance: Preparing Your Pool Liner for Winter
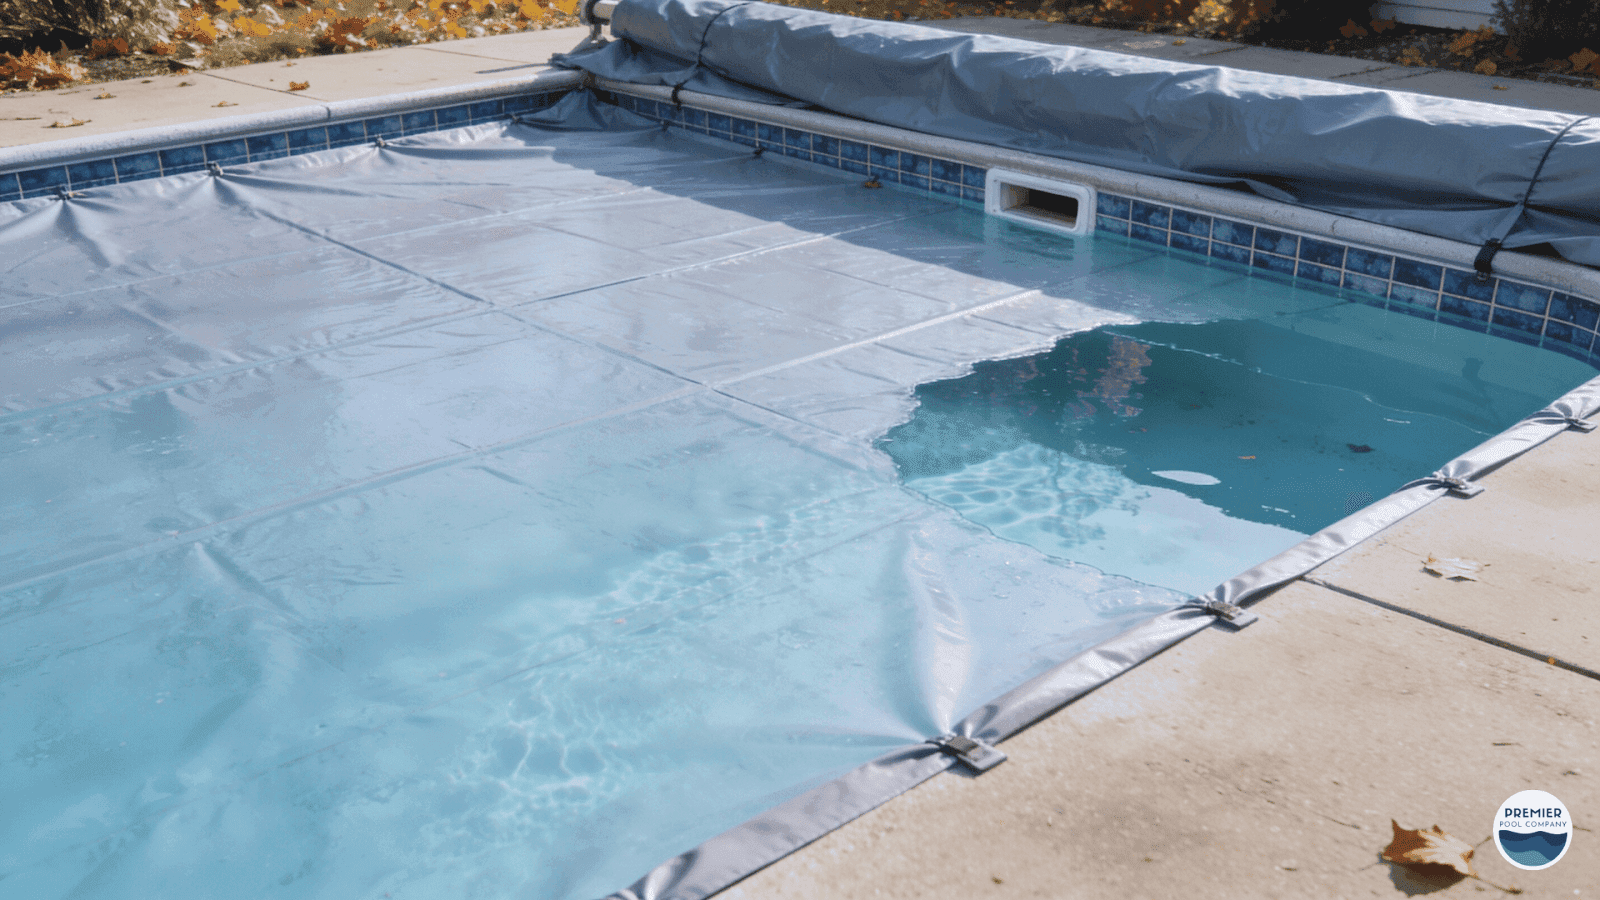
Seasonal maintenance is essential for protecting your pool liner during the winter months. Properly winterizing your pool can prevent damage from freezing temperatures, debris, and harsh weather conditions. By following a few key steps, you can ensure that your pool liner remains in good condition and is ready for use when the warmer months return.
The first step in preparing your pool liner for winter is to thoroughly clean the pool. Remove all debris from the water, including leaves, dirt, and insects. Brush the walls and floor of the pool to remove any algae or buildup, and vacuum the pool to remove debris from the bottom. This will help prevent stains and buildup during the winter months.
Next, it's important to balance the chemical levels in the pool water. Test the pH, alkalinity, and chlorine levels, and make any necessary adjustments to ensure that the water is properly balanced. This will help prevent damage to the liner material and ensure that the water remains clean and clear during the winter months. Consider using a winterizing chemical kit, which typically includes algaecide, chlorine shock, and other chemicals to help maintain water quality during the off-season.
Once the pool is clean and the chemical levels are balanced, it's time to lower the water level. Lower the water level to below the skimmer and return lines to prevent damage from freezing water. Use a pool cover to protect the pool from debris, UV exposure, and harsh weather conditions. Ensure that the cover is securely fastened and in good condition to provide adequate protection during the winter months.
Repairing Minor Damage: When to DIY and When to Call a Professional
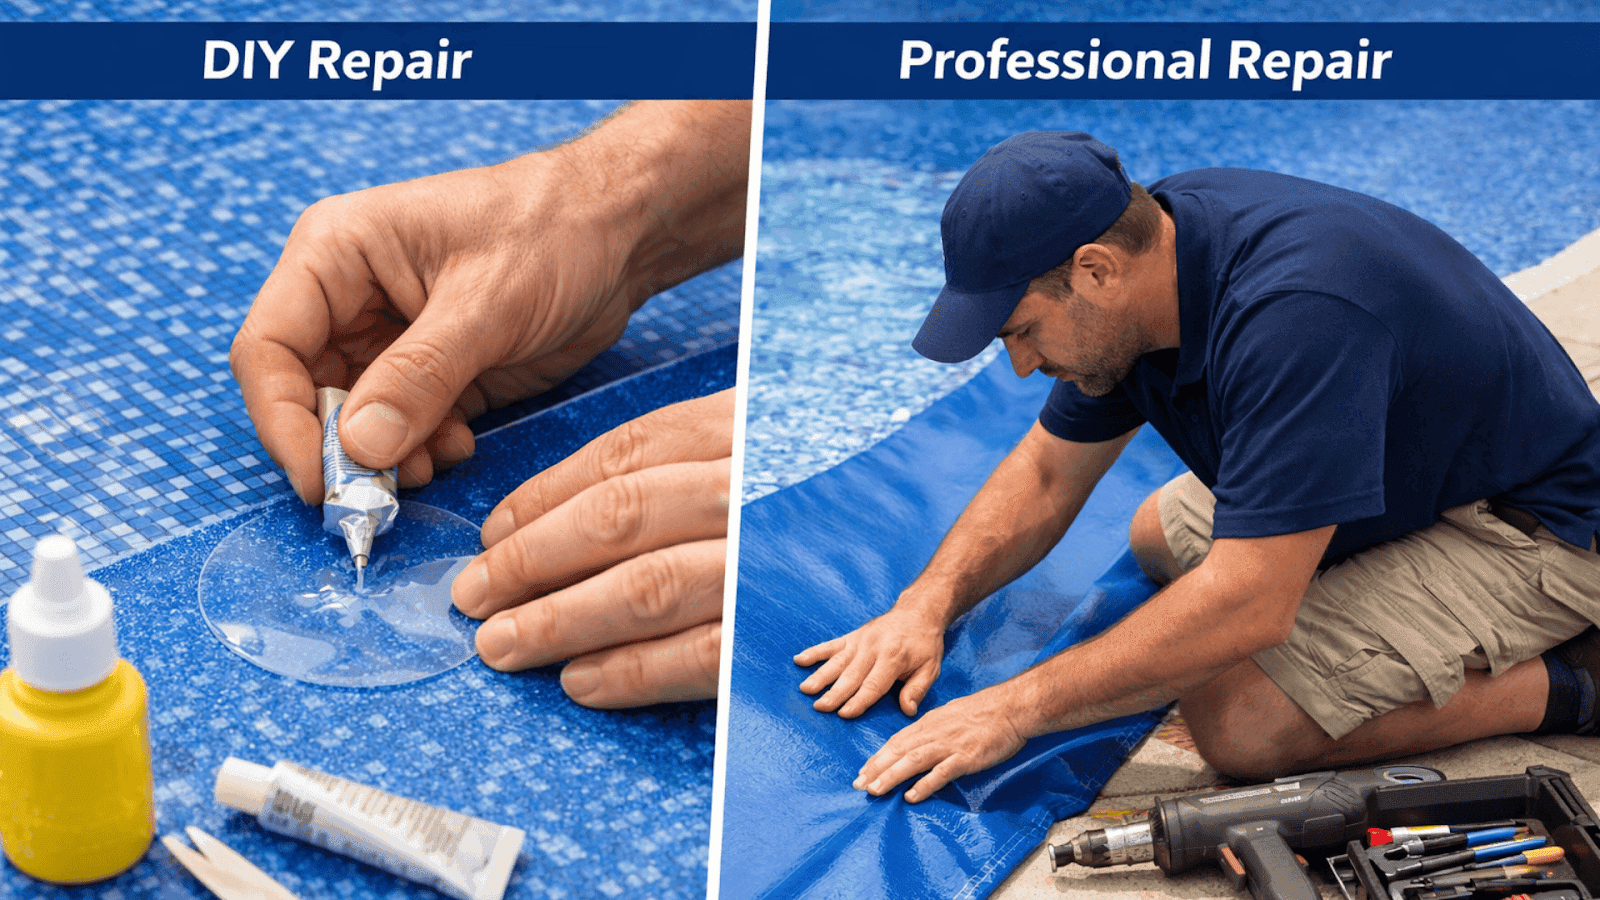
One question I get asked constantly is: "Can I fix this tear myself, or do I need to call Premier Pool?" The answer depends on the size, location, and type of damage. Here's my decision framework based on thousands of repairs:
DIY-Friendly Repairs (You Can Handle These):
• Small Vinyl Liner Tears (Under 2 inches)
- Tools needed: Vinyl patch kit ($15-$30), scissors, underwater adhesive
- Process: Clean area thoroughly → Cut patch 2 inches larger than tear → Apply adhesive → Press firmly for 30 seconds → Wait 24 hours before refilling.
- Success rate: 95% when done correctly
- Time investment: 15-30 minutes
- Cost savings: $150-$300 vs. professional repair
• Surface Scratches
- Use vinyl repair compound or magic eraser
- Buff gently in circular motions
- Works for cosmetic issues only
When to Call a Professional (Premier Pool Recommended):
• Large Tears (Over 2 inches)
- Why: Improper sealing causes recurring leaks
- Risk: Warranty voidance if DIY repair fails
- Professional tools: Industrial-grade adhesives, underwater welding equipment
- Cost: $200-$500 for professional repair vs. $4,000-$7,000 for full replacement
• Seam Separations
- Highly technical, requires re-sealing entire seam
- DIY failure rate: 80%
- Can cause structural damage if done incorrectly
• Fiberglass and Tile Liner Damage
- Requires specialized gelcoat/epoxy application
- Temperature-sensitive curing process
- Wrong repair compound causes discoloration
- Professional assessment: Free at Premier Pool
• Multiple Punctures or Recurring Issues
- Sign of liner degradation
- May indicate need for full replacement
- Get professional evaluation before spending on patches
My honest advice: If you're unsure, call us for a free assessment. I've seen too many DIY repairs that cost more to fix than the original damage. A 15-minute consultation can save you thousands.
Upgrading Your Pool Liner: Signs It's Time for a Change
Even with the best maintenance, pool liners don't last forever. I've been replacing pool liners for 15 years, and one of the most common questions I get is: "How do I know when it's time?" The truth is, your liner will tell you, you just need to know what signs to look for. Catching these indicators early helps you budget and plan for replacement before a minor issue becomes an emergency.
Key Signs Your Pool Liner Needs Replacement:
1. Visible Wear & Tear
• Extensive fading that won't improve with cleaning
• Permanent discoloration or yellowing
• Stains that resist all cleaning methods
• Loss of pattern/color vibrancy
⚠️ Why it matters: UV damage has weakened the liner material by 40-50%
📅 Timeline: Appears after 6-10 years depending on maintenance quality
💰 Cost impact: Highly visible, affects pool aesthetics and property value
2. Multiple or Recurring Tears
• Frequent patching needed (3+ times per year)
• Tears reappearing in the same spots
• Patches failing within months
• Consistent water loss issues
⚠️ Why it matters: Liner material has weakened throughout—not just localized damage
📅 Timeline: Typically after 8+ years of use
💰 Cost impact: Recurring repairs cost $500-$1,500/year vs. one-time $4,000-$7,000 replacement
3. Wrinkling or Shifting
• Wrinkles that can't be smoothed out
• Liner pulling away from pool walls
• Bunching at corners or seams
• Uneven, wavy surface
⚠️ Why it matters: Creates tripping hazards, damages liner further, indicates loss of elasticity
📅 Timeline: Occurs in years 7-12
💰 Cost impact: Safety hazard, liability risk for swimmers
4. Age of Your Liner
• Vinyl liners: 8-12 years typical lifespan
• Fiberglass liners: 15-25 years
• Tile liners: 20+ years
⚠️ Why it matters: Material breaks down over time regardless of maintenance quality
📅 Timeline: Proactive replacement prevents emergency situations
💰 Cost impact: Budgeting for planned replacement vs. emergency costs (30-50% higher)
5. Brittleness or Excessive Stretching
• Liner feels thin or brittle to touch
• Cracks when pressed
• Excessive stretching around fittings and returns
⚠️ Why it matters: Chemical damage and UV exposure have degraded the plasticizers in vinyl
📅 Timeline: Usually after 10+ years
💰 Cost impact: Beyond repair, high risk of catastrophic failure
6. Persistent Leaks Despite Repairs
• Water level drops consistently
• Wet spots around pool perimeter
• Patches don't hold long-term
• Increased water bills
⚠️ Why it matters: Liner has developed micro-tears throughout or seam failures
📅 Timeline: Any age if severe damage occurs
💰 Cost impact: Wastes $200-$500/month in water costs, replacement pays for itself
Final Thoughts: Maintaining a Beautiful and Functional Pool Liner
Maintaining a beautiful and functional pool liner requires regular care, proper chemical balance, seasonal winterization, and knowing when to call a professional. By following these essential tips, from weekly water testing to annual inspections, you can extend your liner's life from 5-7 years to 12-15 years, saving thousands in replacement costs.
Whether you need routine maintenance guidance, professional repairs, or a complete liner replacement, Premier Pool is here to help. Contact us today for free consultations and expert advice. Let our experienced team protect your investment and keep your pool in pristine condition, your satisfaction is our priority!
Frequently Asked Questions (FAQs)
Q1: How often should I inspect my pool liner for damage?
A: I recommend a visual inspection weekly and a thorough physical inspection (running your hands along the surface) monthly. After 15 years at Premier Pool, I've found that early detection is key, catching a small tear early can save you $150-$300 in repair costs versus waiting until it becomes a major issue. Also, check seams and stress points quarterly, especially before and after winter.
Q2: What pH level is safe for vinyl pool liners?
A: The ideal pH range for vinyl liners is 7.2-7.8, with 7.4-7.6 being optimal. pH below 7.2 creates acidic water that corrodes the liner material and causes wrinkles and brittleness. pH above 7.8 causes scaling and reduces chlorine effectiveness by 50%. Test your water 2-3 times per week during swimming season to maintain this balance. According to APSP data, 67% of premature liner failures are due to improper chemical balance.
Q3: Can I repair pool liner tears myself, or should I call a professional?
A: It depends on the size and location. Small vinyl liner tears under 2 inches can be DIY repaired with a patch kit ($15-$30) with a 95% success rate. However, tears over 2 inches, seam separations, or damage to fiberglass/tile liners should be handled by professionals. DIY repairs on large tears have an 80% failure rate and can void warranties. At Premier Pool , we offer free assessments to help you determine the best approach.
Q4: How long should a pool liner last with proper maintenance?
A: With proper maintenance, vinyl liners last 12-15 years, fiberglass liners 15-25 years, and tile liners 20+ years. Without proper care, vinyl liners may only last 5-7 years. The key factors are: maintaining proper pH (7.2-7.8), regular cleaning with soft brushes, using pool covers to block UV damage, and winterizing correctly. I've seen clients extend their liner life by 40% simply by following a consistent maintenance routine.
Q5: What's the best way to prevent pool liner fading?
A: Fading is primarily caused by UV exposure and chemical imbalance. Here's my prevention strategy: (1) Use a quality pool cover when not in use, this blocks 60% of UV damage, (2) Maintain proper chlorine levels (1-3 ppm), high chlorine bleaches liners, (3) Keep pH balanced at 7.2-7.8, (4) Avoid chlorine-based cleaners directly on the liner surface. Pool covers are your best investment, $100-$400 for a cover versus $4,000+ for liner replacement.
Q6: When should I replace my pool liner instead of repairing it?
A: Replace your liner when you see: (1) Multiple recurring tears (3+ patches per year), (2) Extensive fading that won't improve with cleaning, (3) Wrinkling that can't be smoothed out, (4) Brittleness or cracking when pressed, (5) The liner is approaching its lifespan (8-12 years for vinyl), or (6) You're spending $1,000+ annually on patches and repairs. Proactive replacement costs $4,000-$7,000 and takes 2-3 days. Emergency replacement during peak season adds 30-50% to costs and takes 4-6 weeks.
Q7: How do I winterize my pool liner to prevent damage?
A: Follow this 4-step process: (1) Deep clean, remove all debris, brush walls/floor, vacuum thoroughly (2-3 hours), (2) Balance chemistry, pH 7.2-7.6, alkalinity 80-120 ppm, add winterizing kit 24-48 hours before covering, (3) Lower water level 4-6 inches below skimmer (never completely drain), (4) Install heavy-duty cover minimum 12 oz per square yard, secured tightly. This prevents freezing damage, debris staining, and UV exposure. At Premier Pool, we offer full winterization services if you prefer professional assistance.
Q8: What cleaning products are safe for vinyl pool liners?
A: Use only pH-neutral cleaners (pH 7.0-7.6) specifically designed for vinyl. Avoid chlorine-based cleaners, abrasive powders, acidic solutions, and any cleaner not labeled "vinyl-safe." For tools, use soft-bristle nylon brushes only, never wire or stainless steel brushes. For light stains, a magic eraser works well (test small areas first). Wrong cleaners can cause fading within 2-3 applications. If you're unsure, bring a water sample to Premier Pool—we'll test it free and recommend the exact products you need.
More Blogs

Aaron Lehner
Should You Add A Swimming Pool Tanning Ledge To Your Pool Design? Here’s My Take On This.
Thinking about adding a swimming pool tanning ledge to your backyard? Discover the costs, pros, cons, and design tips for a perfect pool tanning ledge.

Aaron Lehner
How Long Do Fiberglass Pools Last (Based on Ohio Climate)
Wondering how long do fiberglass pools last? Discover fiberglass pool lifespan, life expectancy, and maintenance tips for Ohio homeowners, up to 50+ years.

Aaron Lehner
Winterizing A Pool - How To Prepare For Ohio Winters
Learn how to winterize your pool for Ohio's brutal freeze-thaw cycles. Step-by-step guide to protect plumbing, balance chemistry, and avoid $5,000 mistakes.